Thursday, May 1, 2008

Sushi


While Patrice was up, we also made some sushi. I first made sushi back in highschool, when Tiffany's mom tried to show us how to properly do the rice. All I remember is that she said not to use red wine vinegar, because it will turn the rice pink. I think that would be pretty cool!


The Rice

Alas, I was shut out in the quest for pink rice. Basically, for sushi rice, you need a high-quality short-grain rice. You want to have as little starch released as possible (or so I hear), so rinse the rice in cold water first, 3-4 times. Some rice says it doesn't need rinsing, like the rice we have right now. I tried it without rinsing and it was ok, but, better to rinse. A note on sushi rice- it works really well for risotto. Just sayin'. Once you've rinsed the rice, cook it according to the directions. For three people, we made three cups of rice, and used it all. And ate it all. And then rolled around on the floor in a food coma moaning about having eaten too much sushi. If you're only going to make rolls (no nigiri), you could probably get away with two cups of rice for three people, but, rice is cheap, so you may as well have enough.

Once your rice is cooked, fluff it and let it cool a bit, then add some rice vinegar and white sugar. You can use regular white wine vinegar or white vinegar instead, but use considerably less, since it is much stronger. This part is all to taste. I like my rice pretty well flavored, so I start by adding the vinegar and sugar in equal parts by the tablespoon. Adjust as needed, but don't overdo it. However, even if you think you're close to overdoing it, you're probably not, and it will work out fine.

Fillings

This is the fun part. Decide what you want to fill your rolls with ahead of time. While I love nigiri (and sashimi), I'll leave that to the pros, because they just cut the fish better, and because making rolls is fun! In my mind, there are three categories of stuff for sushi: fish, vegetables, and yummy artistic stuff.

The Veggies: My staples are avocado, cucumber, and scallions. You can have carrots, too, if you julianne them finely enough. Take the seeds out of the cucumber before slicing it. You can get creative and put other veggies in there, too.

The Fish: You need to get your fish from a reputable fish dealer. Ask for sushi-grade fish. Usually you can get tuna and salmon without much of an issue, sometimes you have to call ahead. We got our fish from New Deal Fish Market, and called the day before to ensure they'd have the fish we want. Ed picked up some tuna, salmon, yellowtail, and tobiko (this actually falls into the "yummy artistic stuff" category). We got about a pound of fish for three people. It was enough.

Yummy Artistic Stuff: This is the stuff that you garnish the rolls with or roll them in. I'd never gotten tobiko before to make my own sushi, I highly recommend doing that again (its like little fish roe). We also used sesame seeds and "crunchies". The crunchies were just toasted panko, a rough bread crumb, but you could probably make some of your own by crushing up croutons or something. We also made some spicy tuna mixture. In a bowl, combine maybe 1/3C of mayonnaise with about 2 tablespoons of soy sauce and a couple dashes of hot sauce. Keep adding hot sauce until it is spicy enough for your tastes. Dice some tuna, and mix it with the spicy mayo. It is now ready for assembly.


The nigiri is on the far side of the plate. A combination of tuna, salmon, and yellowtail. The rolls to the right and back are spicy tuna (garnished with scallions), and there are some yellowtail and scallion rolls, rolled in tobiko. Also there are some random veggie and fish rolls, based on the whim of the moment.

Assembling the rolls:
Once your rice is cool and mixed with its sugar and vinegar, you can start to assemble the rolls. Slice your fish up into small-ish slices, so that it will easily fit into your roll. Start with a piece of seaweed (nori), and tear it in half. Line your sushi rolling mat, or a clean dish towel, with a piece of plastic wrap. Put the shiny side of the nori on the plastic wrap, and take about a handful of rice and spread it on the other side. You want this layer as thin as possible, while still providing full coverage. If you keep your hands wet while working, the rice won't stick as much. Sprinkle a yummy artistic addition onto the rice, and sort of press it into the rice. Flip the nori over so that the shiny side is facing up now. Put your fillings along the side of the nori that is closer to you, eyeballing how much you should fill the roll. It might take a little practice to get it right. Then carefully but firmly roll it shut, using the mat/plastic to get a tight roll.

Once you have your roll, transfer it to a cutting board, and using a very sharp knife that is wet, cut your roll in half, combine the two halves and cut into 6-8 pieces total. Flip them upright and garnish with scallions if you want or just place them artistically on a plate. It is art, after all -- edible art!

Wednesday, April 30, 2008

Rhubarb-ginger muffins


It's rhubarb season! I found a recipe for rhubarb-ginger bread, and tried to adapt it to muffins, but they definitely need more sugar next time I make them. Granted, if you slather the muffin with strawberry jam it is perfect! I put candied ginger in these muffins, but you could probably leave that out. It just seemed like a good idea, and I wanted an excuse to buy some candied ginger.

Ingredients:
2C flour
1/2 tsp baking soda
1/2 tsp baking powder
1/2 tsp salt
1/2 tsp dried/powdered ginger, or freshly grated if you have it
1/2C sugar (I would up this to 3/4 or 1 cup if you aren't going to put jam on it)
1 tbs oil
1 tbs yogurt
3/4C milk
2 egg whites (or one egg, I just happened to have egg whites to use up)
1/4C candied ginger, chopped
1-1/2C diced rhubarb (about 2 stalks)

1 tbs sugar (optional, for sprinkling on top)

Preheat your oven to 350 and grease a muffin tin. Combine the dry goods (flour, soda, powder, salt, sugar, ginger) in a big bowl, then combine the wet stuff (oil, yogurt, milk, eggs) in a 2C measuring cup or a different bowl. Add the rhubarb and ginger to the dry stuff, then mix the two together, without overmixing. It will be a pretty dry dough. The muffins are much breadier than cakey. Plop the dough into the muffin molds, sprinkle with sugar if you want, and bake for 15-20 minutes, until they are golden-brown.

Monday, April 28, 2008

Mojito Cupcakes


As I hinted in my last post, we made two batches of cupcakes. Car bomb cupcakes, and mojito cupcakes. The car bomb cupcakes were absolutely amazing, says I, but while the mojito ones were good, they weren't quite as mojito-y as I wanted. I think the first problem was messing up the lime curd that I was filling them with, and the second problem was that the only rum I had was coconut rum, so the frosting just tasted like coconut. Also, they weren't quite minty enough. Probably because the lime curd was overpoweringly lime-y, which, while good, is overpowering. Would I make these again? Definitely! But with changes.

So, we made two different kinds of lime curds. One was overcooked (the full fat version) and the other one (the healthy[er] version) wasn't sweet enough. We tried to do a mint-rum frosting, but, as I said before, it just tasted like coconut. The cake body itself was a mint chiffon cake, and tasted very yummy without all its accoutrements.

Mojito Cupcakes
1C flour
1.5 tsp baking powder
1 tsp mint extract; optional but recommended
5 tbs hot milk
1C granulated sugar
2 eggs, whites and yolks separated
1/2 tsp salt
1C mint leaves, crushed

Preheat your oven to 350F.

Heat half a cup of milk with the crushed lime leaves, bring to a simmer for 5-10 minutes, then remove from heat and drain the leaves. Meanwhile, beat your egg whites to stiff peaks. Put hte yolks, 1/2C of sugar, milk, and vanilla into a big bowl and beat them to combine. Add the rest of the sugar, the flour, salt, and baking powder, and then fold in the egg whites. I did the folding in three steps. First I folded/stirred 1/3 of the egg whites into the batter, to lighten it up. Then I folded in another 1/3 of the egg whites, and then I folded in the last 1/3.

Bake your cupcakes either in cupcake wrappers or in an ungreased pan. The batter gets its lift primarily from the eggs, and needs to be able to climb up the walls of the pan. Only fill the cupcake molds 1/2 way up, as they'll rise a fair bit. Cook them 10-20min, and let them cool completely before frosting.

Lime Curd, V1.0 and V1.1
V1.0:
1/2C sugar
1/3C lime juice
4 large egg yolks
5 tbs butter, cut into 1/2-inch cubes
1-1/2 tsp lime zest

Put all the ingredients into a saucepan, and heat on medium-low for 8-10 minutes. It should look slightly thickened, but it will thicken up more when cooled. Remove from heat and put into a clean bowl, and cover with plastic wrap so that a skin doesn't form. Chill for at least 1hr.

V1.1:
1/3C lime juice
1 tsp lime zest
5 tbs sugar (I suggest using more)
1 egg
1/2 tsp vanilla extract

In a small saucepan over medium heat, dissolve the sugar into the lime juice. Add the zest. Lightly beat the egg in a small bowl, then whisking constantly, slowly pour the sugar/lime into the egg. Beat for 2 minutes, then transfer back into the saucepan, and heat over low, stirring constantly, until it just starts to bubble at the edges. Remove from heat and stir in vanilla. Cover with plastic wrap and chill for at least 1 hr.

Each of these recipes makes ~2/3-1C.

Mint-Rum Buttercream Frosting

1 stick butter
3C powdered sugar
1/2 tsp salt
4 tsp mint milk (leftover from the same stuff you used in the cake)
1 tsp mint extract
1 tbs lime juice
3 tbs rum

Cream the butter and salt, then add half the sugar and the milk and beat until combined. Add the rest of the sugar, the mint extract, and the lime, and beat for a while. Add the rum, and any more sugar if you think its necessary to stiffen up the frosting. Chill for at least 10 minutes before using.

Assembly
Take a cold cupcake, and cut out a reverse cone, so that part of the middle is missing but you can put the "cap" back on. Put in a dollop of lime curd, then add the top again. Frost either using a plastic bag to pipe the frosting or spread with a knife.

Car Bomb Cupcakes


For those not in the know, a car bomb is an alcoholic drink, where you take a glass of Guinness, and drop a shot-glass full of Jameson and Bailey's into the glass, and then drink it really fast before it curdles. Aside from the whole curdling thing, carbombs taste really good. I had recently stumbled across a recipe for a Guinness chocolate cake, and Bailey's frosting seemed like the perfect companion. After a brief google search, it turns out that many people have made car bomb cupcakes. And here I'm thinking that I was all original. Anyway, Patrice, a friend from highschool, was visiting, and I told her about my plans to make these cupcakes, and she got more excited than even I had been. Since we both had to bring cupcakes to various events later in the weekend (she'd forgotten a birthday, I had a bike team party), we decided to make two batches. One of car bomb cupcakes, and one of mojito cupcakes, with some twists on a recipe I'd used before. I'll post the mojito cupcakes later.

Car-bomb Cupcakes

2C Guinness Extra Stout
2 sticks butter
1-1/2C unsweetened cocoa powder
4C flour
3C sugar
1 tbs baking soda
1-1/2 tsp salt
4 eggs
1-1/3C yogurt

Preheat your oven to 350F. Bring the Guinness and butter to a simmer in a large saucepan over medium heat. Do not boil. Add the cocoa powder and whisk until the mixture is smooth. Cool slightly.

Whisk the flour, sugar, baking soda, and salt in a large bowl to blend. In another large bowl, beat the eggs and yogurt to blend. Add the stout-chocolate mixture to the egg mixture and beat just to combine. Add the flour mixture to the wet stuff, and fold the batter until it is combined.

Bake the cupcakes in liners, for 17-22 minutes. Allow the cupcakes to cool completely before frosting. We stuck ours in the freezer...

Bailey's cream cheese frosting

1 stick of butter
4oz cream cheese (1/2 a big block)
1/2 tsp salt
4 tsp milk
1 tbs lemon juice
1 tsp vanilla extract
3 tbs Bailey's Irish Creme
3-5C powdered sugar

With an electric mixer, cream the butter and salt for about 30 seconds. Add the cream cheese and beat, and then add about a cup of powdered sugar and the milk and beat until combined. Scrape down the bowl. Add the vanilla and lemon, and another cup of powdered sugar. Add the Bailey's. Then, as you continue to beat, add more powdered sugar until the frosting is as stiff as you'd like it, and fluffy. Be sure to taste...

The frosting can stay in the fridge for up to 4 days if tightly wrapped. Stir the frosting well before using ot get the air bubbled out of it, then put some in a plastic bag and snip off the corner to pipe it onto your completely cooled cupcakes. We found that refrigerating the cupcakes after frosting kept it looking nice.

We had enough batter for 36 cupcakes, and enough frosting for 32 cupcakes, so you might want to add more butter and cream cheese to the frosting to stretch it. Or, bake half the recipe of cupcakes and put on more frosting! These cupcakes got rave reviews from everyone who tried one. Including me.


Patrice packing up her cupcakes to take home in a nifty cupcake carrier. Later that night, I biked over to Somerville balancing a cooler full of cupcakes on my handlebars... genius.

Edit 9/14/08: Check out my version 2 of the car bomb cupcakes here!

Sunday, April 27, 2008

Thai Rice Pudding

I picked up an interesting bag of rice during my last grocery shopping expedition. Sweet rice, also called glutinous rice, is related to arborio rice, the common Italian rice used to make risotto. Like arborio rice, sweet rice has a lot of starch (not glutin, glutinous rice is a misnomer), and while cooking the starch leaches out and thickens the dish. Perfect for making a delicious rice pudding!


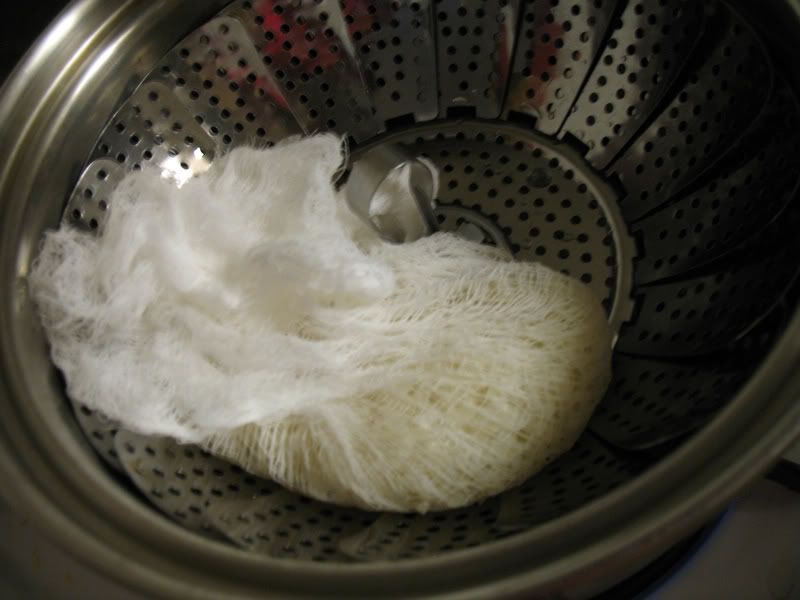
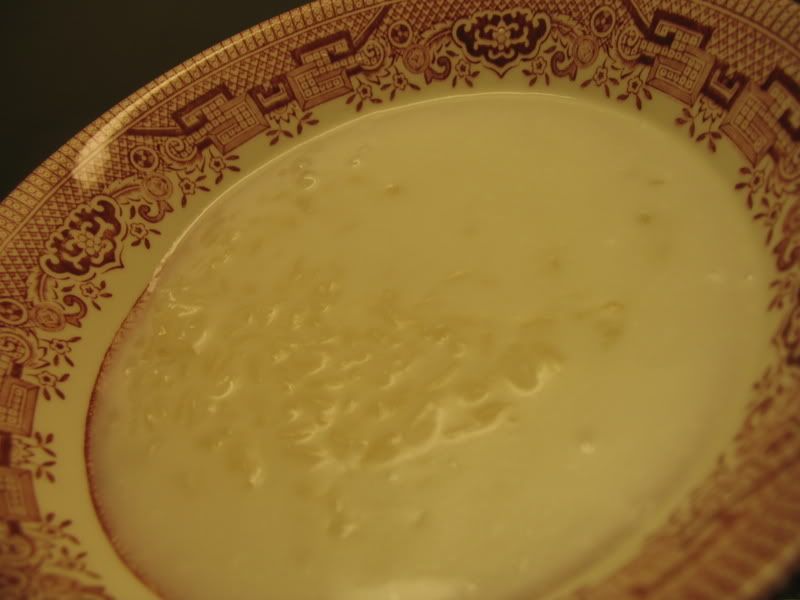
To prepare sweet rice you first soak it at least 6 hours. You then steam it wrapped up in cheesecloth for 20 minutes like I have in this picture . While it's almost done steaming, you heat up your liquids for the pudding. For the ~1 cup of rice that I made, I used 1/2 can of coconut milk and 1/2 c of water. I didn't add spices for the first go, but I think spices like cinnamon or cardamom would work nicely. Once the liquids are boiling, and the rice and cook until it thickens. Lemme just say this was delish! Next time I want to serve with some mango slices, and I hope to get a better finished dish pic then.

Friday, April 25, 2008

Pretzels!


(this one is cheese-filled, and some of the cheese oozed out... yum!)

I'm not going to lie, the only thing I did here was take the pictures and eat the pretzels. Oh, and I preheated the oven. I got home and Ed was making pretzels, which sounded like a fantastic idea. One of them had cheese in it, and really, that was the best one, according to me. Ed thought the ones without cheese were better. They were good, don't get me wrong, but generally, melted cheese makes anything better in Alex-land.

The recipe came from the King Arthur Flour book, and Ed cut it in half since he didn't know what he'd do with 16 pretzels. I guess that was smart. The recipe is the same as a basic bread recipe, then you let it rise until doubled. Cut the dough into 8 pieces, roll them into snakes, let the snakes relax a bit, roll them out some more, twist them up, and let them sit for 20min. About. Then boil them for a minute, brush with egg wash and salt, and bake in a hot oven. A bunch of steps, but overall pretty easy.

Ingredients:
3C all-purpose flour
1-1/2 tsp yeast
1-1/2 tsp sugar
1C warm water
1-1/2 tsp salt
3-4C grated cheddar cheese (optional)

6C water
2 tbs baking soda

1 egg and 1 tsp water for the egg wash

The Method:
Dissolve the sugar into the water, then add the yeast. Let that sit until the yeast is all activated and bubbly, then add a cup of flour. Stir that in, then add the salt. Add the rest of the flour. It might not mix completely, that is fine, you can finish adding it all as you knead. Knead the dough for about 10 minutes, until it is very smooth and shiny and stretchy. Grease a clean bowl, and let your dough rise until it's about doubled in size.

Divide the dough into 8 pieces (use a big knife for this). Roll each piece into the longest snake you can manage. Let the snakes sit for a couple minutes to relax, then roll them out again. Then you can twist them up into pretzel shapes. Let them sit for (ideally) 20 minutes. We got away with 10 minutes.

Cheese-filled pretzels
If you want to make cheese-filled pretzels, use a rolling pin and flatten out the snake as wide as it will go. Using about half a cup of cheese per pretzel, pack some cheese against one of the edges of the flattened snake. Roll the snake from the long end, to close up a tube of cheese. Pinch the long edge firmly shut once you're done rolling, or else the snake will come undone and cheese will ooze everywhere. Pinch the ends shut, then twist up your pretzels into pretzel shapes and continue with the regular instructions.

Cooking the pretzels
Preheat your oven to 450F. Bring 6 cups of water and 2 tbs of baking soda to a boil. You'll want to reduce this heat a little when you start cooking the pretzels, so that you don't deflate them. Apparently, any sudden movements will deflate the pretzels, so be very careful moving them around. Simmer each pretzel for about one minute, then remove them with a spatula or slotted spoon to the greased baking sheet, brush with the egg wash, and sprinkle with coarse-grained salt or herbs or something. Bake the boiled pretzels in the upper third of the oven for 10-15 minutes, until golden brown and done-looking.


A plateful of pretzels!

Monday, April 21, 2008

Maple Pecan Scones


I like scones. I like maple syrup. I like pecans. I'll put them all together! I put maple icing on half the scones, and an egg wash on the other, and I think I prefer the ones with the egg wash. The maple icing is very sweet, works for dessert, but not breakfast.

3C flour
1 tbs brown sugar
1.5 tsp baking powder
1/2 tsp baking soda
1/2 tsp salt
1/2C pecans
6 tbs frozen butter
1/4C buttermilk
3/4C milk
1/2C maple syrup
1 egg

Toppings:
1 egg for egg wash
2 tbs maple syrup
3/4C icing sugar
1 tsp water

Preheat your oven to 375F. Mix the dry stuff well. Use a cheese grater and grate the frozen butter into the dry goods. Mix the butter pieces with your fingers for a bit, not too long. Add the pecans. In a separate bowl, beat the egg and the other wet stuff. Combine the two, do not mix too much.

Form into three ball, flatten them a bit, slice into 8 slices for each disc of dough. Brush with egg wash if you want them shiny, or if you want to glaze them, bake as they are. Bake at 375F for 15-20min.

To make the icing, mix 3/4C icing sugar with 2 tbs maple syrup and 1 tsp water. It is really sweet. Once the scones have cooled completely, you can ice them.

This makes 24 scones.