Winter storm Nemo hit Boston Friday night, and is still going strong into Saturday morning, so I figured what better time to bake something delicious? Thankfully we haven't lost power, despite three transformers going out (flash! bang!) in the thirty minutes we were out for a walk last night. These buns have an overnight rise, so you have to continue to trust that the power won't go out in the morning, when you want to bake them, but luckily we're all set now!
I couldn't find a recipe I really liked online, so I sort of made up my own. You want a rich, dense, dough, and I was going to make
these ones from Bonappetit.com, because they look delicious, but I read through the recipe, and I got to the bottom where they list the nutrition information, and it's 830 calories *for one bun*. I may eat 3000 calories a day, but I think I can probably find a recipe without three sticks of butter in it. I want breakfast, not dessert...
Anyway, here's my recipe. It was delicious. Ed-rating was also delicious, but he would prefer a lighter, more pastry-like dough, and more gooey filling on the inside. Ok, so that three-stick-of-butter recipe... The only trouble is that I ended up with 14 sticky buns, so maybe I should have cut them smaller, to fill two pans. Instead, I crammed 11 of them into one pan, and the others didn't get a topping (they were still delicious - think cinnamon roll).
Sticky buns
Dough
1C milk, warmed up in microwave to lukewarm
2 tbs melted butter
1/4C sugar
1 tsp yeast
1 tsp kosher salt
1 egg
3.5-4C flour
Mix together the milk, butter, sugar, and egg. Beat well, to froth the egg. Dump in the yeast, and let that stand ~5min until it's a bit bubbly. Dump 2C flour and the salt on top, mix up the salt and flour before mixing the dry stuff down into the wet. Add another cup of flour, mix that in - at this point, it'll be rough and shaggy, you want to get it to a smooth and silky texture. Use the fourth cup of flour to knead the dough until it's smooth and silky, adding flour as necessary. Grease a bowl, and put the dough in the bowl for 1-2hrs, until it's about doubled in bulk.
Topping
This made twice as much as I needed - halve
4tbs butter
3/4C brown sugar, packed
1/2tbs corn syrup
1tbs cream
Put all the ingredients into a non-stick pan on the stovetop. Cook over medium, until you get some bubbles:

Once you have bubbles, simmer, stirring the bubbles occasionally, for 3-4 minutes.

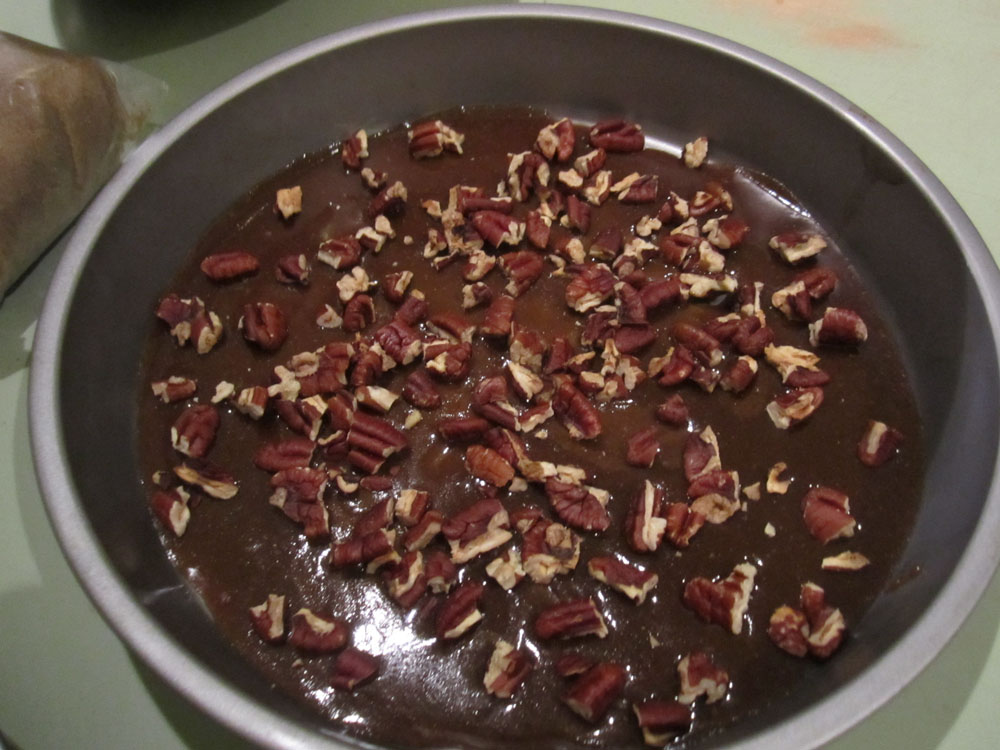
Remove from heat, and pour the topping into two very well-greased 8" diameter pan (one pan if you make half the amount of filling. Duh).

Meanwhile, toast the pecans in the oven, for ~10min (don't burn them!). Sprinkle the pecans onto the topping that's cooling in the pan.

 Filling
3 tbs butter, melted
~2-4tbs brown sugar
~2-4 tsp cinnamon
Once the dough has risen, roll the dough into a long rectangle on a lightly floured surface. Supposedly, 12x16" and 1/4" thick. I just sort of rolled it out until it looked big enough. Because it's so dense and rich and has already risen, the dough won't scootch back the way pizza dough sometimes does. It'll stay right where you roll it.

Melt the butter in the microwave, and pour on top of your dough log. Use your fingers to spread out the butter evenly, across the whole surface. Then take the brown sugar, and sprinkle on top of the butter. Use your fingers again to spread it around and get even coverage, but leave a ~1" strip along the top (away from you) with no sugar.

Liberally sprinkle cinnamon on top of the sugar.

Now roll your dough log tightly, starting with the end that's towards you, and place it seam-side down. Cut in half with a sharp knife, then put the two halves next to each other and cut into ~1" rolls (I cut mine too high, hence only ending up with 14 rolls instead of 16). Place the rolls cut-side down into the prepared pan of toping. Don't let them touch each other - they'll rise overnight and in the oven.


Let the rolls rise overnight in the fridge (cover with plastic wrap or a towel or tinfoil or whatever), and in the morning, take them out. They need to heat back up to room temperature, I put mine next to the radiator in the kitchen to speed the process. Once they're at room temperature, preheat your oven to 400F. Cover the rolls with tinfoil loosely, to prevent the tops from browning too much, stick them in the hot oven, and immediately reduce the heat to 350. Cook for 20min with the tin foil on, then remove the tin foil and cook another 15min.
Once they're done, golden brown and delicious, immediately invert the pan onto a plate. Scrape any extra gooey bits onto the buns =). Let them cool just enough that you don't burn your fingers, and enjoy!

Before inverting.


 So, browsing the internets, we came across Amateur Gourmet making this. It looked delicious, so, we made it, too. The tahini sauce was a little different than what he'd made, since we didn't have any fresh lemons - we mixed tahini with greek yogurt, ground cumin, cardamom, clove, cinnamon, grains of paradise, and red pepper flakes (we also didn't have any za'atar - we'd had some, but it's long since gone, and we haven't gotten more). The end result was a truly delicious way to eat squash. So good, in fact, that we did it again a few days later.