Sunday, June 23, 2013

Olive bread

This is a good bread.  Definitely got a high Ed-rating, and most recently a high real-person rating, too, when I brought it to dinner the other day.  Use good kalamata olives - canned olives will just taste like canned olives, which can be tasty if there's nothing else to eat in your house, but the kalamata olives taste way better.  This bread used a starter, which is how you'd do sourdough if you're into that, but I'm not, because there's no way I'd keep a sourdough starter alive; I can't even keep plants alive.  Anyway, I find the bread is easier to knead when you've used a starter, and then it rises wonderfully once you knead in all the extra stuff.  But I haven't figured out how to get those big holes, which to me is the mark of tasty bread.  Ed likes that this stuff is a pretty uniform texture.  I want big holes, like in the no-knead bread that I sometimes make.  I probably just have to let it rise longer after I shape it.  

This is probably ~1C olives.  Looks like a lot, but it's just right.

Kalamata Olive Bread
Makes one loaf

Starter:
2-2.5C flour
1/4tsp yeast
1.75C warm water

Mix together all the start ingredients.  It was really humid today, so I used 2.5C flour instead of the usual 2.  Then let that sit for 2 hours.  At the end, it should look all loose and bubbly, like the photo above.

Dough:
2-3C flour
~1C olives
~1tbs salt
a glug or two of olive oil

Add two cups of flour and the salt and olive oil to the start, and mix that with a spoon until it comes together enough to knead.  Knead for a while, until it makes a nice little doughball.  Add the olives, and knead/fold until the olives are all combined.  You'll probably need to add another cup of flour to keep things workable during this process.  


Looks like too many olives...

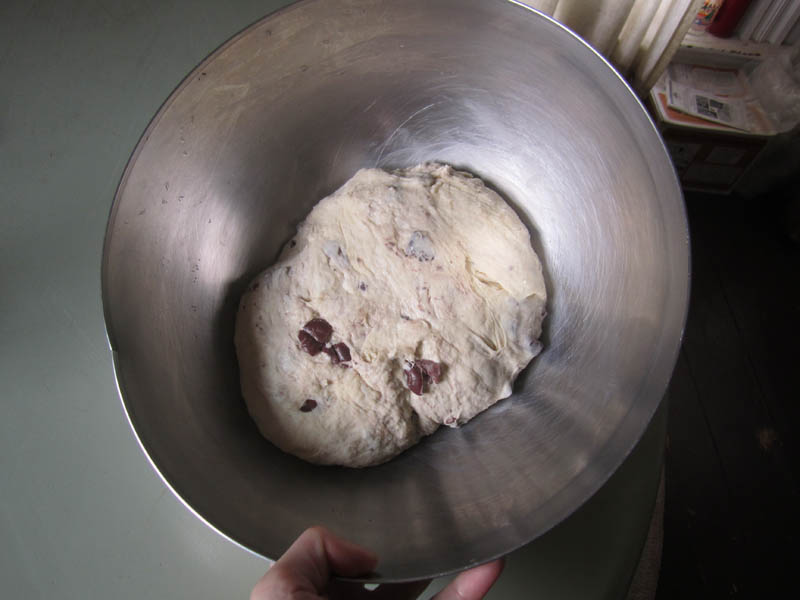
But it's not too many - just right!

Let the kneaded dough sit in a greased bowl for another 2 hours.  At the end, it should be soft and pillowy, and about twice as large.  Transfer that to a baking sheet, that's either been greased or has coarse cornmeal on it.  

Preheat the oven to 450.  Once that's pre-heated, in goes the dough, and turn the oven down to 350.  Bake for 20-40min, checking every 10min or so; remove the bread once it's toasty golden brown on top, and has a hollow sound when you knock on the bottom.  This one took 40min for me.

Try to let it cool at least 5-10min before cutting into it.

Enjoy!

Thursday, June 20, 2013

Thai stirfry

We stopped by the Super88 the other day, picked up some fresh udon noodles.  These guys are interesting, just super thick, chewy, and strangely delicious noodles.  I figured we had the proper ingredients for a stir fry, of the Thai variety, if only because of the limes that I had kicking around.  Stir fry dishes are pretty loose when it comes to a recipe, but Ed started eating this and declared that it got an extremely high Ed-rating.  Then he considered for a bit, and amended the statement to be "the best cabbage dish I've ever had", and then amended the Ed-rating to even higher, as in this is so tasty he'd actually pay money for it at a restaurant.  I'm not sure what the difference was - I mean, this was one good stir fry - but I figured I'd better write down the pieces that turned it from a pile of cooked food stuffs into a unified dish.


I started by flavoring the oil.  Into the wok went a solid glug or two of vegetable oil. Once that was hot, but not yet smoking, I dropped in a dried red thai chili, cut into thirds or so.  All the seeds immediately fell out, and that gave a really nice kick to the dish.  Toss that around for a bit, maybe 30s, and once you can smell the spice (if you want really spicy, add 2-3 peppers), throw in some minced garlic, ginger, and thinly sliced lemongrass.  In retrospect, I should have done with the lemongrass what I did with the pepper, and thrown in a large chunk or two, just to flavor the oil, rather than cutting it into pieces, since it wasn't a fresh stalk of lemongrass, so it was kind of woody.

Aromatics set, now it was time for the filling bits.  About a quarter of a head of purple cabbage, diced, and some floppy-looking use-me-now-or-never kale made up the veggies.  On top of those went a large pinch (a small handful?) of brown sugar, a few small glugs of soy sauce, and a small glug of fish sauce.  Once the veggies were no longer raw, in went some cubed firm tofu and the udon noodles.  And the juice of two limes.  Then a large handful of basil leaves, and some cilantro leaves fresh on top once you pull it off the heat.

The only thing that really would have made the dish is if we'd had some ground peanuts for the top.  Anyway, I think it was the large quantities of lime juice that sealed the deal for me; we'll be making variations on this for a while!


Thursday, June 13, 2013

Fried halloumi salad


We picked up some halloumi the other day at Russo's.  It's basically a cheese curd.  And delicious!  One of the best ways to eat this cheese is when it is grilled or fried up, so that it's got a slightly smoky flavor and some crunchy bits, as well as the telltale squeakiness of a cheese curd.  mmmm.

We fried up some slices in a pan, then threw those down on top of a salad of bitter leaves - kale, radicchio, arugula, frisee, maybe some others.  I think the dressing was a pretty simple vinaigrette of lemon, dijon mustard, and olive oil, though I am seeing some chopped pickled garlic in the photo, so clearly we put some of that on top, too.

It was delicious!  I recommend making it.  You could grill your halloumi if you don't want to fry it, but make sure the pieces are thick enough - it does melt a little bit as you apply heat, and you wouldn't want it to fall through the grill!

Sunday, June 9, 2013

Cauliflower and cheese galettes

I don't remember where I got the idea for this, but I know that somewhere on the internet, I'd seen somebody making little single-serving galettes filled with vegetables and cheese.  It looked good, and like the perfect thing for a picnic, because you could just eat them with your hands, since since we were traveling off to Saratoga Springs for a weekend of orienteering racing, picnic-type foods are what you want.  Also, I'd so much rather refuel with real food than with random bars and gels and stuff.  Tastes better.  So, real food it is!

These are Ed-approved, because they tasted good, but he wasn't such a fan of the whole planning ahead for food at races idea.  He's not really into the whole planning ahead deal in general.  Not like that stopped him eating them after the race.


They're filled with a grated summer squash, some roasted cauliflower, ricotta cheese, and possible some parmesan? I can't remember.  And an onion, and some garlic.  And an egg.  You mix together all those things, put them in the middle of a small round of pie crust, fold up the edges, and back until the top of the crust is golden brown.  I'd guess around 20min, but this year nearly a month ago that I made these, so things are a little fuzzy.


Pretty tasty with a side of crispy kale, too.  I topped them with some grated sumac, which has a delicious lemony-flavor, so tasty!  But you could skip that part.  You could also fill these with anything at all.  Pretty flexible, as long as it's relatively uniformly textured and not too gooey.

I'll definitely make these again!

Saturday, June 8, 2013

Iced coffee

Oh boy, I'm way behind on posting some of the delicious things we've been eating.  So I figure I'll come back to blogging by not blogging about food at all, but about iced coffee.  I didn't used to be an iced coffee fan, but with the heat wave that had just gone through, I knew I would not be able to deal with drinking hot coffee, and I do love drinking out of a straw.  I'm not sure I could drink iced coffee without a straw - it's that engrained.  
Anyway, I used to make iced coffee by just chilling down some regular hot coffee.  BUT! I was intrigued by trying out the cold-brew method after reading that it changed the way the coffee came out of the coffee grounds (there may be a technical term for that), something about not activating some of the tannins, resulting in a less bitter drink.  Not that bitter is a bad thing, but I wanted to see if cold brewing the coffee resulted in a better product.  I think it does, in the end.  It tastes richer, if that makes any sense.  And I love watching the milk when you pour it in (yes, I like my coffee with milk.  Don't judge), all swirly and pretty.


To make cold-brew coffee, put about twice the amount of ground you'd normally use into a jar (mason jar works well), and pour in some cold water.  Keep in mind if it's a big jar, you're making two cups of coffee, so put in enough grounds for that.  (4-5 heaping scoops).  You don't want it to come out watery!  Stir it all around, then put on a lid and leave it in the fridge for 8-12 hours.  Come morning, dump the whole thing into a french press, press, and drink!  

One thing you definitely should do - make some coffee ice cubes.  That way, you aren't watering down your coffee by putting water ice into it.  I also recommend using a coarse grind, the same as you would for a French press.

I recommend this stuff.  Especially when the temperature cracks 90 degrees.