Friday, April 25, 2008

Pretzels!


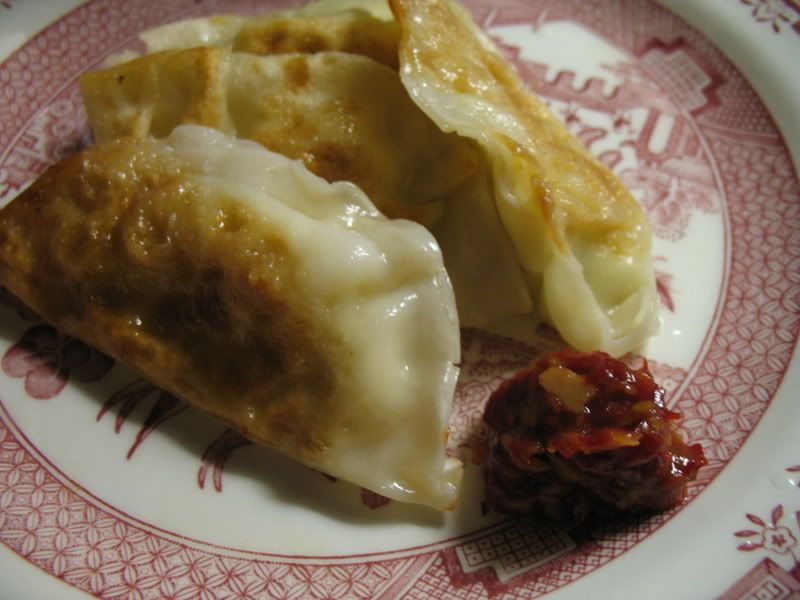
(this one is cheese-filled, and some of the cheese oozed out... yum!)

I'm not going to lie, the only thing I did here was take the pictures and eat the pretzels. Oh, and I preheated the oven. I got home and Ed was making pretzels, which sounded like a fantastic idea. One of them had cheese in it, and really, that was the best one, according to me. Ed thought the ones without cheese were better. They were good, don't get me wrong, but generally, melted cheese makes anything better in Alex-land.

The recipe came from the King Arthur Flour book, and Ed cut it in half since he didn't know what he'd do with 16 pretzels. I guess that was smart. The recipe is the same as a basic bread recipe, then you let it rise until doubled. Cut the dough into 8 pieces, roll them into snakes, let the snakes relax a bit, roll them out some more, twist them up, and let them sit for 20min. About. Then boil them for a minute, brush with egg wash and salt, and bake in a hot oven. A bunch of steps, but overall pretty easy.

Ingredients:
3C all-purpose flour
1-1/2 tsp yeast
1-1/2 tsp sugar
1C warm water
1-1/2 tsp salt
3-4C grated cheddar cheese (optional)

6C water
2 tbs baking soda

1 egg and 1 tsp water for the egg wash

The Method:
Dissolve the sugar into the water, then add the yeast. Let that sit until the yeast is all activated and bubbly, then add a cup of flour. Stir that in, then add the salt. Add the rest of the flour. It might not mix completely, that is fine, you can finish adding it all as you knead. Knead the dough for about 10 minutes, until it is very smooth and shiny and stretchy. Grease a clean bowl, and let your dough rise until it's about doubled in size.

Divide the dough into 8 pieces (use a big knife for this). Roll each piece into the longest snake you can manage. Let the snakes sit for a couple minutes to relax, then roll them out again. Then you can twist them up into pretzel shapes. Let them sit for (ideally) 20 minutes. We got away with 10 minutes.

Cheese-filled pretzels
If you want to make cheese-filled pretzels, use a rolling pin and flatten out the snake as wide as it will go. Using about half a cup of cheese per pretzel, pack some cheese against one of the edges of the flattened snake. Roll the snake from the long end, to close up a tube of cheese. Pinch the long edge firmly shut once you're done rolling, or else the snake will come undone and cheese will ooze everywhere. Pinch the ends shut, then twist up your pretzels into pretzel shapes and continue with the regular instructions.

Cooking the pretzels
Preheat your oven to 450F. Bring 6 cups of water and 2 tbs of baking soda to a boil. You'll want to reduce this heat a little when you start cooking the pretzels, so that you don't deflate them. Apparently, any sudden movements will deflate the pretzels, so be very careful moving them around. Simmer each pretzel for about one minute, then remove them with a spatula or slotted spoon to the greased baking sheet, brush with the egg wash, and sprinkle with coarse-grained salt or herbs or something. Bake the boiled pretzels in the upper third of the oven for 10-15 minutes, until golden brown and done-looking.


A plateful of pretzels!

Monday, April 21, 2008

Maple Pecan Scones


I like scones. I like maple syrup. I like pecans. I'll put them all together! I put maple icing on half the scones, and an egg wash on the other, and I think I prefer the ones with the egg wash. The maple icing is very sweet, works for dessert, but not breakfast.

3C flour
1 tbs brown sugar
1.5 tsp baking powder
1/2 tsp baking soda
1/2 tsp salt
1/2C pecans
6 tbs frozen butter
1/4C buttermilk
3/4C milk
1/2C maple syrup
1 egg

Toppings:
1 egg for egg wash
2 tbs maple syrup
3/4C icing sugar
1 tsp water

Preheat your oven to 375F. Mix the dry stuff well. Use a cheese grater and grate the frozen butter into the dry goods. Mix the butter pieces with your fingers for a bit, not too long. Add the pecans. In a separate bowl, beat the egg and the other wet stuff. Combine the two, do not mix too much.

Form into three ball, flatten them a bit, slice into 8 slices for each disc of dough. Brush with egg wash if you want them shiny, or if you want to glaze them, bake as they are. Bake at 375F for 15-20min.

To make the icing, mix 3/4C icing sugar with 2 tbs maple syrup and 1 tsp water. It is really sweet. Once the scones have cooled completely, you can ice them.

This makes 24 scones.

Sunday, April 20, 2008

Lo Mein

I generally have a cooking sucess rate around 50%. I think it's cause I enjoy experimenting, but certain combos that sound really good in my head (like sesame ginger muffins) are not that good in real life. Today's meal though, was a fantastic success. I feel I have the right to brag because of a few recent failures.

I'm still on an Asian food kick after visiting the Hikari market, so I decided to do something a little more interesting than just stir fry with my new yellow noodles. I decided to give lo mein a go. Lo mein is characteristically a saucy noodle and veggie dish.

The noodles came wrapped up like little ball, and I used 3 of these, which resulted in 2-3 cups of cooked noodles. I then stir fried my veggies in a mix of canola, sesame, and spicy oil. The sesame is too strong on its own, but it gives a really deep flavor as part of the mix. The spicy oil has chili and ginger in it and gives the dish a good little bite. I used cabagge, carrots, red peppers, and onions as my veggies, but anything would work well with this.

I then prepped the sauce:
3/4c veggie broth
1/4c tamari (higher quality soy sauce, it's all I use now!)
1T cornstarch

Stir the cornstarch until dissolved, then add it to the veggies when they're cooked. Let the sauce bubble thicken for about a minute. Then throw in the cooked noodles and mix mix mix.


The problem with having a culinary breakthrough is that I don't have anyone to share it with. So Alex, the next time we hang out we should consider giving this a try!

Saturday, April 19, 2008

Jiaozi

There's a little Asian food store down the street from my house, but previously I had been buying all my groceries from Wegman's, which does a nice job with the international foods. I had heard though that stuff was cheaper here, and if you went on the day of their shipment, you could find some fresh veggies too. Inside it's super cluttered and it's almost hard to walk around. There were so many weird things here without any English written on them. The meats were kinda out in the open, and you had to scoop them up yourself an drop them in a plastic bag (I don't think I would eat it even if I was a meat eater). Everything else was pretty good looking, and I spent a while in here having a hard time deciding just what to get.

I ended up deciding to make chinese dumplings, or jiaozi. I bought some premade wrappers, napa cabbage, ginger, onions, and tofu. I chopped up the ingredients and sealed them in the wrappers by wetting the edges of the wrappers with water. I then fried them in sesame oil and steamed them until they were finished. I served them with a chili sauce I found at the store. According to my Taiwanese friend that's more of a potsticker recipe, but it came out tasty nonetheless. For dessert, I took some of the remaining wrappers and filled them with sweetened adzuki beans, which I think is a little more Japanese inspired. Although I probably screwed up the authenticity of these recipes, they still turned out pretty damn good.

Thursday, April 17, 2008

Cilantro-Yogurt flatbread


Stolen from epicurous, these were awesome. Basically, you throw together some flower, baking soda, salt, coriander, and cilantro. Then you mix it with some yogurt, pat it out flat, and fry it in olive oil.

Sunday, April 13, 2008

Scallop ceviche, and other yummy things


Saturday was a good day. The whole day had something to do with food. I slept in, ate blueberry pancakes with maple syrup for breakfast (and OH MY GOD AMAZINGNESS were they blueberry-ish blueberry pancakes!), and then we decided to go to Formaggios, a fancy-shmancy cheese shop in Cambridge, to pick out some cheese. We got there, and while we were waiting for the girl to get us some aged gouda, we oogled and oggled everything else in the store. Naturally, we walked out of there with some rabbit pate, raspberry vinegar, and bamboo rice. Apparently, bamboo rice is just short-grained rice that is steeped in the essence of bamboo, but we were strangely attracted by it's lime-green hue, and impulse-buying resulted. Driving home, we started thinking of what sort of salad we wanted to make with our raspberry vinegar, and by the time we'd gotten home we'd decided that we just needed to have some ceviche to go with our salad and bread-and-cheese course. So, we headed to Russo's to pick up some fresh veggies and lots of citruses, and then over to New Deal to get some fish. Driving over there, I started to question if we were foodies. Ed doesn't like that term, and countered with the point that pre-WWII, or in a different country now, this sort of activity (going to a specialist shop for each different type of food) wasn't such a strange thing. Probably right, but now it seems like a sort of snobbism. Anyway, I don't mind, because we had an awesome meal out of it.


Things you can get at Formaggios: (left to right) Rabbit pate, goat cheese with paprika, bunderfleish (acquired in Europe, not here, but they have it at Formaggios), aged gouda. Bunderfleish is an air-cured beef, and it is like beef jerky only about 1000 times better. Especially sliced thin and layered on a sandwich with a good swiss cheese...

At New Deal, they had some dry scallops, which was exactly what we wanted. Apparently normal scallops have been soaked in some sort of preservative chemical, and take up a lot of water in the process. Thus, when you're paying per pound you're paying for a lot of water. Dry scallops, on the other hand, haven't been soaked in whatever solution normal scallops have been in, therefore taking up flavors of cooking better, as well as being more bang for your buck. The things you learn. Anyway, buy your scallops (or fish) from a reputable source, since you aren't really cooking it with ceviche. I mean, you're denaturing the proteins, resulting in a cooked-feeling texture, but any bad things in the fish will still be there.

Scallop Ceviche
1/2lb scallops
juice of two lemons
juice of two limes
juice of 1-1/2 blood oranges
1.5 tsp salt
1 tsp chili flakes
2 cloves garlic
5 small radishes
1/2 onion
2 tbs cilantro, finely chopped
2 tbs parsley, finely chopped
lemon juice as needed


Ed made this, and his directions were that you just lump it all together and let it sit. Here is more detail: Mix together your citrus juices. Finely slice the garlic, onion, and radishes. Cut off the tough part of the scallops, and slice it into approximately 1/3 inch slices. Put everything into a big bowl, and add enough lemon juice to cover the things in the bowl if the other juices don't do the trick. Let this sit in the refrigerator for at least two hours. Then you can eat it. It's amazing, the scallops will feel like they've been cooked.


The end result was delicious. The scallops were perfectly done, and had this wonderful tangy, citrus-y flavor. The radishes were a little over sour, though. The bamboo rice? Nothing worth writing home about. The subtle grassy flavor was completely masked by the more strong-flavored foods on the plate. Save your money and stick with white rice!


Raspberry-Honey Vinaigrette*

1/4C raspberry vinegar
1 tbs good-quality balsamic vinegar
3 tbs honey
1 tsp fresh ginger, chopped finely
~1/4C olive oil
1 tsp salt
a couple grinds of black pepper
1/2 tsp ground coriander
*These values are approximate. I never measure my salad dressings... adjust ingredients as needed.

Put everything except the oil in a bowl. Whisk to combine. Add the oil, whisking as you go. Stop adding oil when it looks and tastes oily enough to you.

Raspberry vinegar, balsamic vinegar, and honey, don't like to mix without some help...

The rest of the salad was some mixed baby greens, spinach, watercress, pears (tossed with some butter and sugar and broiled until just softened), candied pecans (tossed with some butter and sugar and baked at 350 until toasted, sugar slightly caramelized), goat cheese, and craisins. This was the best salad I have had in forever and ever.

Yum.

Saturday, April 12, 2008

Experimentation, and some successes

Experiment #1: Fresh Fruit Tart:


I have lots of time to play in my kitchen in April. Instead of spending the whole time making muffins (my preferred way to spend my baking time), I branched out and decided to try and make something pretty. Something worth taking a picture of. I love those fruit tart things, with the pastry cream base and lots of fresh fruit on top with a glaze over top of the whole thing--so I figured, why not? I'll make a fruit tart. Keep in mind, I've never made pastry cream, and I hate anything to do with pie crusts, except eating them.

First, the pie crust. I've made plenty of pie crusts, but I really just hate making them. I'm probably just not a good roller-outer. I used the Joy of Cooking's recipe for a tart crust, with powdered sugar in it. I also incorporated (this might be the problem) some of Alton Brown's (of the TV show "Good Eats") wisdom, using a tablespoon of whiskey in the dough instead of straight water. His reasoning is that when you mix alcohol and flour, the flour doesn't bind as well with the alcohol, resulting in less gluten formation, whereas water and flour bind quite well and the gluten does it's thing and makes the dough all tough. So, I used some whiskey. Rolling out the dough wasn't that bad, but I didn't exactly make it look pretty in the pans, and surprisingly enough it didn't end up looking any prettier after baking. The recipe:
1-1/4C flour
1/3C powdered sugar
1/4tsp salt
4 tbs chilled butter, cut into cubes
1 tbs whiskey
4 tbs ice cold water
Mix the powdery stuff in a food processor, then add the butter and process until its in really tiny lumps. Add the liquid one tablespoon at a time until you can pinch the dough and it sticks together. Dump it in a pile on a table, and form it into a ball. Wrap with plastic wrap and refrigerate 30-60 minutes. Roll it out, put it in whatever pan you plan on baking it in, and blind bake it until golden brown at 400F.

Next was the pastry cream. Again I turned to the trusty Joy of Cooking. Their recipe for pastry cream didn't seem overly complicated, so I gave it a try. Recipe:
4 egg yolks
1/3C sugar
2 tbs flour
2 tbs corn starch
1-1/3C milk
3/4tsp vanilla
Beat on high speed until thick and pale yellow, about 2 minutes, the sugar, flour, corn starch, and yolks. Meanwhile, in a medium saucepan, bring the milk to a simmer. Gradually pour 1/3 of the milk into the egg mixture, whisking to combine. Pour the egg mixture into the pan and cook over low to medium heat, whisking constantly and scraping the bottom and corners of the pan to prevent scorching, until the custard is thickened and beginning to bubble. Then continue to cook, whisking, for 45-60 seconds. Using a clean spatula, scrape the custard into a clean bowl. Stir in the vanilla. Cover the surface of the custard with a piece of wax paper to prevent a skin from forming. Cool, then refrigerate before using. This keeps, refrigerated, for up to 2 days.

I guess I didn't cook my custard long enough, because it was a little too runny. Somewhat custard-like, but definitely a runny custard. I also forgot to glaze my fruit, or put jam down on the crust to prevent leaking. The assembly is to spread some warmed jam on the crust, glop in some custard, and artfully arrange some fruit. Then you can pour some warmed (microwaved) jam on top that will work as a glaze.

So, my fruit tart definitely looked pretty. It tasted delicious, too, although I would much prefer my custard a little less runny. And don't worry, you can't taste any whiskey in the crust!

Experiment #2: Maple Walnut Sticky Bars!


These bars tasted amazing. But my filling stayed a little runny. Talking to Ed about it later, we realized that I had used maple syrup that is hand-bottled in a kitchen operation by his aunt Marion, just down the road in Newton. Now, her syrup is delicious, eaten straight, but our hypothesis was that it is not boiled enough with the same precision as a larger operation, meaning that adding more sugar won't cause it to crystalize like normal syrup would do. Just another reason to try these bars again with a different maple syrup!

Crust:
1-1/4C flour
2 tbs sugar
1/4 tsp salt
8 tbs butter (1 stick)
2 egg yolks

Filling:
1/2C maple syrup
1/3C brown sugar
1/2C heavy whipping cream
3 tbs butter
1/2 tsp vanilla
1-1/2C walnuts

Mix together the flour, sugar, and salt. Add the butter, softened, and mash it around with the back of a fork until the dough is all in little balls. Add the egg yolks, then press into a buttered pan and dock with a fork or add some baking beans. Blind bake at 400F for 20 minutes, until it is fully cooked and golden. Brush with another egg yolk and cook for another 2 minutes, until a hardened glaze is formed.

Combine the maple syrup, brown sugar, cream, and butter in a saucepan, and bring to a boil. Boil for 30 seconds, then remove from heat and add the vanilla and nuts. Pour the hot filling into the crust and bake for 15 minutes, until the middle is bubbly. Cool, then chill for at least 1 hour before cutting it open.

This recipe was stolen from epicurious.com.