Wednesday, June 13, 2018

Cucumber salad, kale chips, and stuffed chicken

We're running out of vegetables already. Maybe we eat more veggies than most people? I can see that we probably won't have an issue using up our allotment. Anyway, this one took care of the entire head of kale, which was kind of small, honestly, and one of the cucumbers and a radish or two.


Kale Chips
Not so much recipes, here, as a concept. Eh, that's how we cook these days, for the most part. Kale chips are easy and delicious, unless of course you can't stand the taste of kale. That's ok too, I'll take your kale. It definitely has a taste, kind of earthy, a little charred, a little bitter. I like it. Anyway, rip the leaves off the stems, and break them into bite-size pieces. Toss with some olive oil and kosher salt and bake at 300 degrees F for 15-30 minutes, tossing after 10 minutes to make sure the leaves are dehydrating evenly. Ed likes his crispy kale a little less crisp, I like mine crispy enough that it'll shatter when you eat it. 

You can experiment with other flavors; garlic salt comes to mind. We never get that fancy, and have been known to go through well over a pound of kale in a sitting. Can too much vitamin A make you sick? Quintessential white suburban millennials, here. 

Cucumber Radish Salad
The cucumber salad was another quick one. Since we're basically out of greens, I chopped the cucumber, chopped a few radishes, chopped some mint and some chives (from the garden), and tossed with a lemony vinaigrette. This would have been really good with more parsley, but we were out. I also cooked up some barley to fill it out, and mixed that in once it was cooked.

Everything else
The chicken was all Ed. He de-boned the chicken thigh, then rolled it up around a mixture of feta (still have some after the spanakopita!), oil-cured olives, sundried tomatoes, and chives, before trussing it up. Seared it in a mix of olive oil and butter in a cast iron pan, then into the oven to finish. It was delicious, tender and piquant. 

Some other meals, that used up all our green things - a giant salad on Saturday night, that used some of everything. Both heads of lettuce (they were small), a leaf of napa cabbage, a leaf or two of kale, radishes, parsley, chives, scallion, green garlic, sunflower seeds, feta cheese, soft-boiled eggs, and a maple/miso/lemon dressing. 

Sunday we brought a fairly unremarkable slaw over to our friends' house for dinner. It was good, but kind of just a mixture of what veggies we had left. All the napa, parsley, cilantro, chives, grated carrot, lemon juice, salt. A few sad tomatillos from the bottom of the fridge. Sumac sprinkled on top. That would have been better with some garlicky aioli, but we were out of eggs by that point, too. 

The spanakopita made about 4 servings for us, so I've been finishing that off for lunch. At this point all we have left are some carrots and radishes, plus a couple potatoes and a sunchoke that have been languishing in the fridge for too long, so tonight's dinner may be interesting, definitely going to be spelunking through the various condiments and pickles in the fridge. Tomorrow more veggies though! 

Monday, June 11, 2018

CSA Week #1

After years of wanting to do this, we finally signed up for a CSA, from RedFire Farm, in Granby MA. Ed is mostly excited about visiting the farm and picking herbs and stuff, I'm mostly excited about having a new challenge of cooking in-season and using different vegetables than my usuals I get every week from Russos. Of course this is a little more expensive, but I like that our money is going directly to a farmer, and our food is coming from somewhere less than 100 miles away.

I figured this was an excellent reason to reinvigorate the blog a bit. I'm going to try and post the recipes that we're cooking with this stuff, and how I'd improve on what I've made. I'm sure my photos will consider to be mediocre at best, but the food will be good.


This week, we got:
2lb carrots
1lb spinach
2 heads redleaf lettuce
1 bunch green garlic
1 head napa cabbage
1 head red russian kale
1 bunch parsley
1 bunch radishes
2 cucumbers

Some of this stuff I knew I wanted to use quickly - radish greens, for example, wilt quickly. When I picked up the radishes, the greens looked gorgeous, but I knew they wouldn't keep.

The kale, carrots, cabbage, parsley, radishes, and cucumbers, on the other hand, would keep all week just fine.

So, the first thing was some roasted carrots with a radish green pesto, served alongside a spanakopita-like thing. Sort of a spanakopita cobbler. In the future, we're going to skip the cobbler part, and either do a pie crust as an upside-down pie, or just bake the filling and spread on toast. I mean phyllo dough would also be fine, but that's finicky.

Roasted carrots with radish green pesto
1 pan's worth of carrots, washed but not peeled
~1tbs olive oil
a pinch of kosher salt

1 bunch radish greens
1 handful walnuts
1 clove garlic
1 sprig green garlic
half a lemon's juice
salt to taste
A glug or two of olive oil

Dump the carrots on the pan, pour on the olive oil and roll them around until they're coated. Sprinkle on some salt, and put in a 400 degree oven for 15-20 minutes until they're as done as you like them. If you put them into the oven as it's pre-heating, you'll get more concentrated heat from the heating elements, which will help brown the side closest to the elements (for my oven, that's the bottom), without overcooking the carrots. I like my veggies with good caramelization, but not overcooked.


For the pesto, toast the garlic clove and the walnuts in a pan. Once those are fragrant and slightly browned (not blackened), dump into a food processor with all the greens and some salt and the lemon. Blend, adding oil as needed to make it blend right. Not enough oil and you won't get a paste. Taste, adjust seasoning, taste.

This will keep for a week or two, if you don't use it all immediately on the carrots.


The carrots with their radish green pesto, served alongside the spanakopita thing and some fried loukaniko sausages. The sausages, while delicious, weren't really necessary.

Spanakopita Thing
I started with this recipe. But I changed things, so here is my version:

1lb spinach
4 cloves garlic
1 small onion
2 scallions
half a bunch of parsley
Salt to taste
~1/4lb feta cheese
4tbs olive oil, divided
2 eggs

1.5C flour
1/2tsp baking powder
1 tbs olive oil
1/4tsp salt
1C water

I used a cast-iron pan, so that I could cook all the things in one pan, and then stick the whole thing in the oven to bake.

Sweat the onion and garlic in about a tablespoon of oil. Roughly chop the spinach, and add to the pan with a pinch of salt to help it lose moisture. You may need to cook in batches. Chop the parsley, scallions, and green garlic, and add near the end. You may need to add more oil as you go, in which case, do that.

Mix together all the stuff for the topping. It'll look like pancake batter. Like pancake batter, don't overmix, or it'll get too gluten-y.

In a big bowl, crumble in the feta cheese, and mix it all together with the spinach stuff. Beat the eggs together and add to the bowl. Put more oil in the pan just to lube things up again, then dump in the filling. Smooth it out, then put globs of filling on top. No need to try and make it a crust, let it be more like a cobbler or biscuits. Bake for 40-50 minutes at 400F, until the topping looks golden brown.


Changes for next time:
- The filling could absolutely use the squeeze of a half lemon
- The topping was entirely unremarkable. Next time either make a pie crust and lay on top, or make biscuits and drop on top, or bake without a crust and serve on toast/in pitas/with a spoon/as a pie with no crust
- could have used more egg

The flavor, however, was delicious! Would we make this again? Absolutely, with an alternate crust.


Thursday, April 12, 2018

Sourdough baguettes

I don't know if I've written about our sourdough yet. We make a lot of bread, in general, and like a year ago (more? I have no idea), Ari gave us some sourdough starter. This is a robust starter, that has lived up in the AMC huts, and made a whole lot of bread in its day. Robust is key, because sometimes, we don't make bread for a couple weeks, and just sort of forget about it, and it hasn't died yet. Theoretically, this is more alive than my house plants, but it seems to be surviving a little better.

Anyway, here's a long overdue blog post about bread, and sourdough in particular. Some people get crazy into the details - those are people who are aiming for a consistent product. That's awesome, and good for them, but I like my method, which feels easier and more flexible, and I don't have a kitchen scale anyway. So, the easy thing is to do a no-knead situation, a la NYT no-knead bread recipe.

Feed me
Start with feeding the starter. It's alive, after all. I dump the contents of my starter jar into a big bowl, and mix with 2C warm water and 2C all-purpose King Arthur flour. I've always liked King Arthur Flour, and recently I heard from one of my health-nut friends that the gluten intolerance that lot of people are experiencing is not actually the gluten, but rather the utter shit that passes for flour in some brands. So hey, another excuse to stick with a flour and a company that I know and respect.

So then I re-fill my start jar with stuff from the bowl. Theoretically, leave that out of the fridge to let it feed, but sometimes it only gets 10min outside before I have to leave or whatever and put it back in the fridge. I leave the jar semi-screwed.

What's left in the bowl is the starting point for the bread.

Mix stuff in
No-knead
The quick version is to add another 2C of flour, any sort, and two ish tsp of salt. I tend to do two two-finger scoops of kosher salt from the salt jar. I think that's a little more than a teaspoon each time. Stir this into a shaggy mess, and then leave it alone, covered with plastic (I stick the whole bowl into a big plastic bag), for 8-24 hours. The length of rise can basically replace kneading in terms of gluten development.

Kneaded version
The no-knead is easy peasy. But I'm coming around to preferring the kneaded bread. Takes a smidgeon more time, obviously. First, do everything you did in the no-knead step. Then, walk away for 10-30 minutes, and give the flour a chance to hydrate. The autolyse step, is what this is called. It'll be a lot easier to knead after doing that. Also, if you're making a whole wheat loaf, this step is kind of crucial to avoid kneading in too much flour and making the loaf denser than a brick.

After the autolyse, flour your work surface and knead until it feels right. Add as much flour as you need to. I think 2-5 minutes is what feels right, but I'm also lazy.

Put the dough back in its bowl, cover, and let it rise about 2 hours. This part is flexible, anywhere from 1-4 hours is probably fine.

Shape the bread
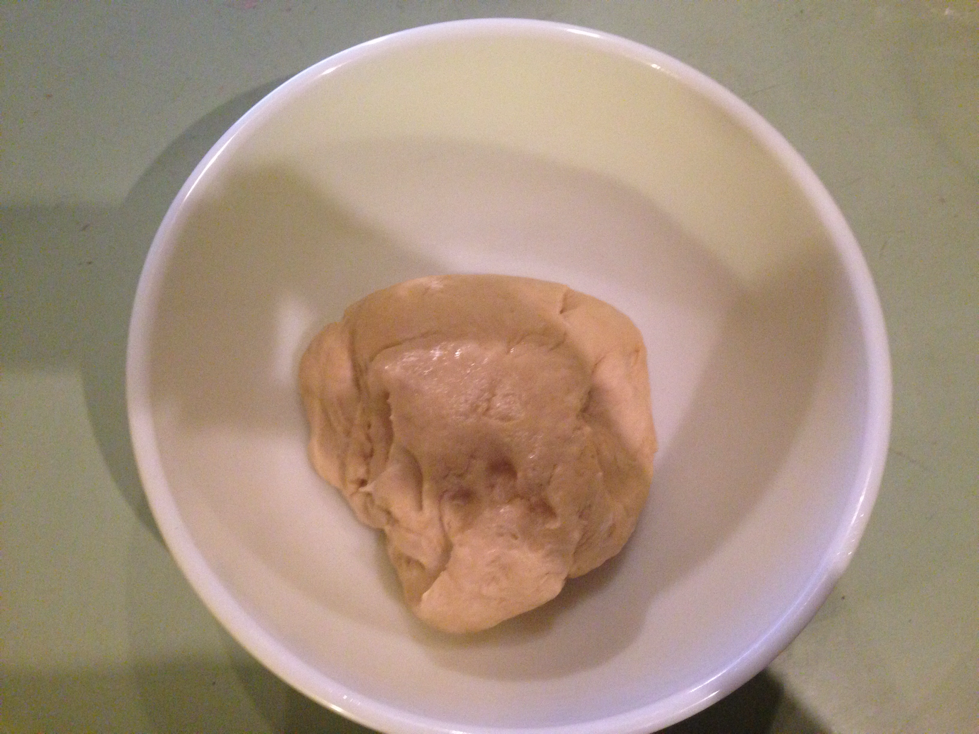
Dump it out, and watch this video to shape some little balls for the second rise. The two-cup version of my bread gets me two baguettes. Let the little balls rise another hour, and then form baguettes.

Preheat the oven to 450F, with a pan of water on the bottom rack. That'll make the steam that you need to develop the delicious, trademark, french baguette crust. We recently acquired a baguette pan, which, besides having adorable little hole patterns in the bottom, allows the steam through the bottom of the pan to make the whole thing delicious and crusty. Without the baguette pan, you have to cook a little longer and turn down the heat and remove the steam when you're halfway through.

Cook me
The baguettes don't have to rise a super long time. Maybe 30 minutes? Once you're ready to cook, slash the tops and pop them into the oven. I tend to do about 25 minutes at 450, and then remove the pan of water (carefully!!), and turn down the oven to 350-400 to finish cooking the innards.

Let the loaves cool at least 5 minutes before cutting them open. Same as meat, you gotta let it rest.


Also delicious: rosemary focaccia. Possibly giving you a recipe for that soon, but the gist is to just add a ton of fresh rosemary, chopped, when you mix in the flour. Then the second rise just dump it out on a heavily-oiled sheet pan and smoosh it to the sides. Makes things crispy and delicious and golden. 

Wednesday, January 31, 2018

Kale salad

Call me a millennial, but I do love a good kale salad. The key thing, though, is to use Dinosaur kale, not the curly sort of kale. Dinosaur kale (also known as Tuscan kale or lacinato kale) seems to have a little more substance to it, which makes it easier and tastier to eat than the curly variety. Also, conveniently, kale doesn't go soggy when you add a dressing and then save some for lunch. 

This was a salad that I think I've had or made before - the toasted almonds and dried cherries make it amazing. Similar to this one. But with more random toppings! Toasted almonds and dried cherries are the important part. Some avocado, because see the millennial part of the first paragraph, roasted golden beets, cooked farro, chopped scallion, and a sprinkle of parmesan cheese. Feta or ricotta salata would have been better, but I only had parmesan on hand.

The dressing was a maple miso vinaigrette. Equal parts maple syrup and miso, about twice that in rice vinegar, and equal parts walnut oil to vinegar. Pretty tasty. Please make again, future-Alex. 


Friday, December 8, 2017

Steak and potatoes

About as "normal" as food gets around here. I wanted creamed spinach, and I had this idea in my head of the creamed spinach we'd made many years ago with bacon and gruyere and a poached egg on top, but I couldn't remember where that recipe was (turns out, it's on my blog. Should have searched here first, duh. That's why I keep this stupid thing! Click here for recipe). So anyway, I remembered the part about the gruyere, and thought that it had been blended, but I was wrong, and we ended up with a pile of green goo. It was a pretty tasty green goo, but kind of disappointing considering what it could have been.

Coming soon: recipe of how to use up your green goo.

Anyway, green goo acquired, and when I was in Russos picking up spinach I got a tenderloin steak, because they often have small half-pound steaks, which is just fine for us, especially when sliced. We may not eat that much steak, but I do love it. Some fingerling potatoes on the side (toss with olive oil, chopped fresh rosemary and salt, and roast for 20-30 minutes at 400F), and a couple roasted carrots just because. Dinner is served! Tasty, arguably healthy, but not so cheap.


Served with a pretty amazing oak-aged stout by Founders. And pink Himalayan salt, because according to the lady at the store that gives good energies. (Kook alarm going off). But the salt bowl is pretty!

Tuesday, August 8, 2017

Beet & black bean burgers

I wanted to make some beet burgers. I had an idea of mixing in some faro or wheat berries or something to make a chewy patty of grains and veggies that you could fry til crispy. Then I realized that black beans would make an excellent binder, as would chickpea flour. The trouble, of course, with making veggie burgers of any sort is that for them to taste good, you need to have a gazillion ingredients. Worth it, though! These have a really nice flavor, and excellent textures. And, they satisfy the tasty/healthy/cheap trifecta!

If you're looking for a meatless Monday option, or just want to try a beet burger, look no further.

The actual recipe is super flexible. The base components are:
- shredded root vegetable (beets, carrots, potatoes, sweet potatoes, parsnips, etc)
- a can of beans (any variety)
- egg (to bind)
- flour (of any variety)
- grain (preferably a whole grain that'll have some chew, because the point is to add texture. So, barley, wheat berries, faro, bulgur, quinoa, rice, whatever)
- flavors (think herbs, garlic, spices)
- salt (duh. everything is better with salt)

This version headed down a Mediterranean route. It was both tasty and very satisfying.

- 2 beets, shredded
- half a carrot, shredded (I had half a carrot languishing in the fridge, which was the only reason for its inclusion)
- 1 can of black beans, roughly mashed
- 1/2C chickpea flour
- 2 eggs
- a buttload of parsley, chopped
- ~1/2C wheat berries, cooked
- 1/4C sunflower seeds
- ~1/4C pickled onions, chopped
- 2 cloves garlic
- 2 tsp kosher salt
- 1 tsp peppercorns, ground
- 1 tsp cumin
- 1 tsp turmeric


The only pre-mix step is to lightly toast the garlic, in some oil, because I don't really like raw garlic. Then, mix everything together in a big bowl.

Generously oil a baking sheet, and form little patties. Bake the little patties at 400F, flipping after about 20 minutes, for about 40 minutes total. The goal is that the outside is crispy, and the inside still has a little moisture. Oil your pan generously for extra crunch. The next step, which I didn't try, but will try next time, would be to coat the patties in panko or bread crumbs before baking, for extra crunchy outsides!


These guys definitely have enough structural integrity that they make pretty darn good travel food, if you're looking for things you can eat with your fingers. But, they're also pretty good drizzled with a lemon tahini sauce, or in a pita with some pickled cabbage.


Served with some roasted cauliflower and some socca (that's for a different blog post. Definitely worth making!!)

Monday, August 7, 2017

Liege waffles

A Belgian waffle is not the fluffy thing you get at an American diner. It's dense and light at the same time, crunchy caramelized sugar on the outside providing a perfect offset to the deep chewy flavorful interior. No toppings necessary, these things are magic. The first one I ever had was at a Belgian beer festival, and I was hooked. I haven't had a "real" waffle in Belgium, yet, the kind from a truck, probably, oozing hot sugar all over my fingers. Someday, I'll visit the homeland, and do it right. Til then... it's gotta be homemade or at beer festivals here.


The challenge here is that you've got to knead in all the butter. One piece at a time. Basically, you make a brioche. And, without a stand mixer, that means you need some serious arm power. Good thing I'm a skier! Getting all the butter mixed in without melting it was a chore, but totally, totally, TOTALY worth it. I couldn't get through the full 14 tablespoons, to be honest - my arm gave out. But, the 12tbs that made it in were good enough. 

I highly recommend the recipe by Deb at Smitten Kitchen. Recipe here: https://smittenkitchen.com/2015/05/liege-waffles/. The main difference between what I made and what she made is that she's better at this food cooking and blogging stuff. Oh, and has a stand mixer.

Some comments -
- Get the butter as warm as possible without letting it melt
- Swedish pearl sugar is indeed a different beast. Next time, I'm trying the smashed sugar cube approach
- Don't leave out the vanilla. I was out, but it could have used that extra heady flavor
- The waffles you cook later are the tastiest, as the sugar has started to really caramelize


In goes the butter, one tablespoon at a time. I would use my spoon to smash it and stretch the dough around it until it was fully incorporated. Don't do this on a hot day, or the butter will melt.


Making my own dough hook out of a spoon and some arm power.


After mixing in the final cup of flour and kneading smooth


After kneading in the sugar and cutting into chunks. I loved how this was dough, and not batter.


I nearly forgot to take a photo of the finished product. We were eating these with our hands, but since I'd also made a more traditional batter waffle (kind of made the batter for that one before deciding I wanted the challenge of the liege dough), we were loading those ones up with fruit, yogurt, apple butter, maple syrup, you name it.


Eaten side by side, the liege waffles were so superior. I mean, it's like comparing a cake to a piece of cardboard. Worth the investment of time and effort!