Showing posts with label Bread. Show all posts

Thursday, April 12, 2018

Sourdough baguettes

I don't know if I've written about our sourdough yet. We make a lot of bread, in general, and like a year ago (more? I have no idea), Ari gave us some sourdough starter. This is a robust starter, that has lived up in the AMC huts, and made a whole lot of bread in its day. Robust is key, because sometimes, we don't make bread for a couple weeks, and just sort of forget about it, and it hasn't died yet. Theoretically, this is more alive than my house plants, but it seems to be surviving a little better.

Anyway, here's a long overdue blog post about bread, and sourdough in particular. Some people get crazy into the details - those are people who are aiming for a consistent product. That's awesome, and good for them, but I like my method, which feels easier and more flexible, and I don't have a kitchen scale anyway. So, the easy thing is to do a no-knead situation, a la NYT no-knead bread recipe.

Feed me
Start with feeding the starter. It's alive, after all. I dump the contents of my starter jar into a big bowl, and mix with 2C warm water and 2C all-purpose King Arthur flour. I've always liked King Arthur Flour, and recently I heard from one of my health-nut friends that the gluten intolerance that lot of people are experiencing is not actually the gluten, but rather the utter shit that passes for flour in some brands. So hey, another excuse to stick with a flour and a company that I know and respect.

So then I re-fill my start jar with stuff from the bowl. Theoretically, leave that out of the fridge to let it feed, but sometimes it only gets 10min outside before I have to leave or whatever and put it back in the fridge. I leave the jar semi-screwed.

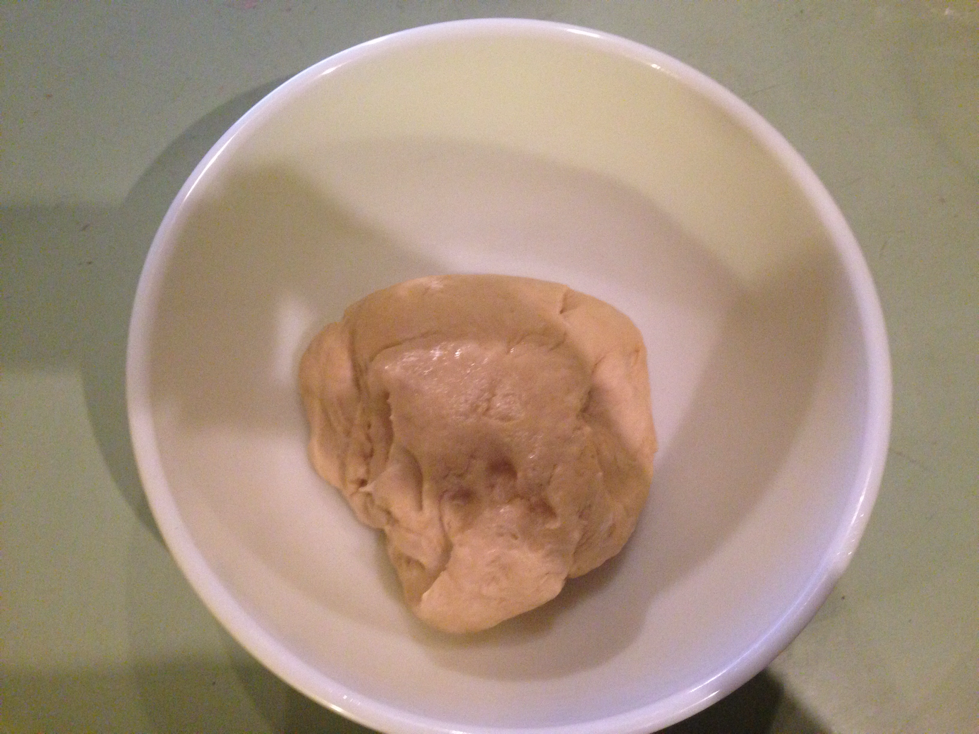
What's left in the bowl is the starting point for the bread.

Mix stuff in
No-knead
The quick version is to add another 2C of flour, any sort, and two ish tsp of salt. I tend to do two two-finger scoops of kosher salt from the salt jar. I think that's a little more than a teaspoon each time. Stir this into a shaggy mess, and then leave it alone, covered with plastic (I stick the whole bowl into a big plastic bag), for 8-24 hours. The length of rise can basically replace kneading in terms of gluten development.
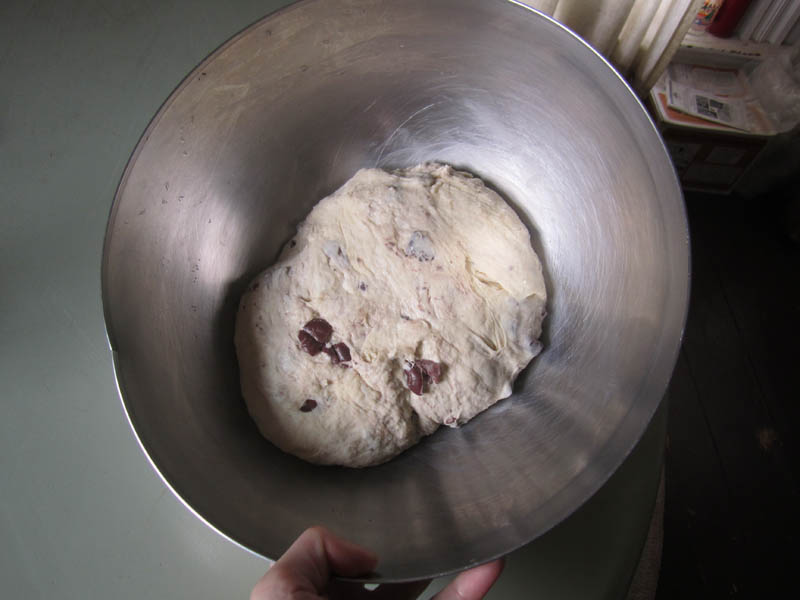
Kneaded version
The no-knead is easy peasy. But I'm coming around to preferring the kneaded bread. Takes a smidgeon more time, obviously. First, do everything you did in the no-knead step. Then, walk away for 10-30 minutes, and give the flour a chance to hydrate. The autolyse step, is what this is called. It'll be a lot easier to knead after doing that. Also, if you're making a whole wheat loaf, this step is kind of crucial to avoid kneading in too much flour and making the loaf denser than a brick.

After the autolyse, flour your work surface and knead until it feels right. Add as much flour as you need to. I think 2-5 minutes is what feels right, but I'm also lazy.

Put the dough back in its bowl, cover, and let it rise about 2 hours. This part is flexible, anywhere from 1-4 hours is probably fine.

Shape the bread
Dump it out, and watch this video to shape some little balls for the second rise. The two-cup version of my bread gets me two baguettes. Let the little balls rise another hour, and then form baguettes.

Preheat the oven to 450F, with a pan of water on the bottom rack. That'll make the steam that you need to develop the delicious, trademark, french baguette crust. We recently acquired a baguette pan, which, besides having adorable little hole patterns in the bottom, allows the steam through the bottom of the pan to make the whole thing delicious and crusty. Without the baguette pan, you have to cook a little longer and turn down the heat and remove the steam when you're halfway through.

Cook me
The baguettes don't have to rise a super long time. Maybe 30 minutes? Once you're ready to cook, slash the tops and pop them into the oven. I tend to do about 25 minutes at 450, and then remove the pan of water (carefully!!), and turn down the oven to 350-400 to finish cooking the innards.

Let the loaves cool at least 5 minutes before cutting them open. Same as meat, you gotta let it rest.


Also delicious: rosemary focaccia. Possibly giving you a recipe for that soon, but the gist is to just add a ton of fresh rosemary, chopped, when you mix in the flour. Then the second rise just dump it out on a heavily-oiled sheet pan and smoosh it to the sides. Makes things crispy and delicious and golden. 

Monday, August 7, 2017

Liege waffles

A Belgian waffle is not the fluffy thing you get at an American diner. It's dense and light at the same time, crunchy caramelized sugar on the outside providing a perfect offset to the deep chewy flavorful interior. No toppings necessary, these things are magic. The first one I ever had was at a Belgian beer festival, and I was hooked. I haven't had a "real" waffle in Belgium, yet, the kind from a truck, probably, oozing hot sugar all over my fingers. Someday, I'll visit the homeland, and do it right. Til then... it's gotta be homemade or at beer festivals here.


The challenge here is that you've got to knead in all the butter. One piece at a time. Basically, you make a brioche. And, without a stand mixer, that means you need some serious arm power. Good thing I'm a skier! Getting all the butter mixed in without melting it was a chore, but totally, totally, TOTALY worth it. I couldn't get through the full 14 tablespoons, to be honest - my arm gave out. But, the 12tbs that made it in were good enough. 

I highly recommend the recipe by Deb at Smitten Kitchen. Recipe here: https://smittenkitchen.com/2015/05/liege-waffles/. The main difference between what I made and what she made is that she's better at this food cooking and blogging stuff. Oh, and has a stand mixer.

Some comments -
- Get the butter as warm as possible without letting it melt
- Swedish pearl sugar is indeed a different beast. Next time, I'm trying the smashed sugar cube approach
- Don't leave out the vanilla. I was out, but it could have used that extra heady flavor
- The waffles you cook later are the tastiest, as the sugar has started to really caramelize


In goes the butter, one tablespoon at a time. I would use my spoon to smash it and stretch the dough around it until it was fully incorporated. Don't do this on a hot day, or the butter will melt.


Making my own dough hook out of a spoon and some arm power.


After mixing in the final cup of flour and kneading smooth


After kneading in the sugar and cutting into chunks. I loved how this was dough, and not batter.


I nearly forgot to take a photo of the finished product. We were eating these with our hands, but since I'd also made a more traditional batter waffle (kind of made the batter for that one before deciding I wanted the challenge of the liege dough), we were loading those ones up with fruit, yogurt, apple butter, maple syrup, you name it.


Eaten side by side, the liege waffles were so superior. I mean, it's like comparing a cake to a piece of cardboard. Worth the investment of time and effort!

Friday, April 14, 2017

Sourdough English muffins

A few months back, Ari gave me some of his sourdough starter. This means we've been making lots of bread. Luckily it's a hearty starter, meaning I can leave it in the fridge for a week or two between feedings, but still, there's more baking going on than usual. At least, we've been going through flour a lot more frequently than before.

The other weekend, I didn't have anything planned, and I picked up our dog-eared King Arthur Flour cookbook, to see what they had to say about sourdough. I learned that the addition of baking soda can nullify some of the sour flavor, which could be a very useful tidbit of information if you're looking to make non-sour sourdough things. Or I could just use yeast, but it's sort of like, why use yeast if I've got the natural stuff sitting in a jar in my fridge? Anyway, besides several variations on bread, which we've discovered by now on our own, King Arthur Flour had a recipe for English muffins. That sounds delicious! Time to try it. 

I used half the recipe, since we're only two people after all.

May have burned one. Oops!

How about topping with butter, jam, and a scoop or two of cottage cheese or ricotta? I recommend.

Tuesday, October 18, 2016

Pumpkin cinnamon rolls

It's autumn, which means all things pumpkin. I usually don't go too crazy for this stuff, but a few weeks ago we had two guys staying with us, one our American friend living in Madrid, and one his Spanish friend. Greg has been missing all things American, like maple syrup, cheddar cheese, and all things pumpkin spice. Juanma had no idea what he was in for, when they went to the grocery store and came back with EVERYTHING pumpkin spice. To be fair, I think the pumpkin spice thing is overdone, but it is good in small doses, and I do love me my squashes.

So Greg and Juanma got me thinking about pumpkin spice, and I had a box of pearl sugar that I'd picked up in Sweden (the best souvenirs are the edible sort), and I don't really like the glaze part of cinnamon rolls anyway, so it was time to make pumpkin cinnamon rolls, with pearl sugar instead of a glaze. I found the pumpkin in the dough makes for a very flavorful and fluffy roll, not at all bready, and the pumpkin in the filling makes it even more moist. I highly recommend taking the five minutes to brown the butter rather than just melting in the microwave - deepens the flavor. I'm thinking that these rolls don't need to be an autumn-only sort of thing... I'll be making them all year!


Dough
2.5 tsp yeast
1/2C warm milk
3/4C pumpkin puree
1 egg
5 tbs butter, melted and divided
2 tbs sugar

3.5C flour
1 tsp salt
1/2 tsp ground cinnamon
1 tsp ground cardamom
1/2 tsp ground nutmeg
1/2 tsp ground ginger

Filling
1/4C pumpkin puree
The other half of the butter you melted earlier
2 tbs white sugar
1/4C brown sugar
1/4tsp salt
2 tsp cinnamon

Topping
Pearl sugar

Assembly
Melt the butter in a saucepan. Take it a little beyond melted stage, and brown it. It'll sizzle and spit for a while, and then it'll stop sizzling and turn brown. This makes it taste so nutty and delicious, you don't want to skip this step.

Warm the milk, and stir in the yeast and proof it. Then add about half the melted butter, the pumpkin, the egg, and the sugar. Stir that around, and then in with the dry goods! Start with about a cup of flour and all the spices, and then keep adding flour until you get a dough you can knead. Turn it out to a floured surface and knead, maybe 8 minutes.

Return the dough to a greased bowl, and let it rise 1 hour, until just about doubled in bulk. It becomes this beautiful orange color; I love it.

Once the dough has risen, generously flour a surface, turn out the dough, flour the top, and roll it out. It'll be loose, soft and pillowy - I think because of the pumpkin. You want a sheet about 11x17".


Mix the pumpkin puree with the remaining melted butter, and brush that onto the dough. Sprinkle the sugar on top, and the cinnamon on top of that. Roll up the sheet of dough starting with the end nearest to you, until it makes a neat little log. Then cut the log into ~1" slices. If you use a serrated knife, you won't squish the spiral. Try to cut without applying any downward pressure.

Arrange the rolls flat-side-up in a greased pan (two 9" round pans, in my case), and let them rise another 45 minutes.

Once they've risen, sprinkle the tops with pearl sugar, and bake at 350F for 25 minutes. You could brush the top with melted butter before adding the sugar, but you can also skip that step.

Devour.


Saturday, August 27, 2016

Kannebular

Sam is an excellent baker, and we were lucky enough to have her hone her skill on the rest day during the world champs this week. Wahoo! She made us kannebullar, which is basically just cinnamon buns, but with that awesome Swedish pearl sugar on top. Naturally, I made her get two boxes of pearl sugar, so I can bring one home. This is a very tasty recipe, and definitely worth making again. For fika, perhaps... 


Dough
150g smör = 10.5tbs butter
50g jäst = 5 tsp active dry yeast
5dl mjölk = 2.1C milk
1.5dl strösocker = 0.63C sugar
1/2tsp salt = 1/2 tsp salt
1.5 tsp nystötta kardemummakärnor) = 1.5 tsp ground cardamom
11-12dl vetemjöl = 4.6-5C flour

Filling
150g butter (smör) = 10.5tbs butter
1 tbs kanel = 1 tbs cinnamon
1.5 dl strösocker = 0.63C sugar

Topping
1 egg
pearl sugar

I think the original recipe is calling for fresh yeast (I think that might be the wrong word for it, but not the dry stuff we usually see at home), but Sam used a packet of dry yeast (14g), which says it is equivalent to 50g of fresh yeast. According to some online calculator, that is ~5tsp of active dry yeast. Go with it!

Heat the milk (to 37 degrees C, but I assume that's warm but not hot, same as you would for bread), and dissolve the yeast into it.

Add the sugar, salt, butter, cardamom, and part of the flour. Mix and keep adding flour until you have a smooth dough, that is not too dry. Let this rise for 45 minutes.

Turn out the dough onto a floured surface. Divide in half. Roll out each half into a rectangle.

Melt the filling butter, and mix with the rest of the filling ingredients. Spread on the dough. Roll up and cut into 2-3cm thick slices. Put them onto a baking sheet to rise again. Optionally, you can place them into little muffin wrappers first, for maximal prettiness at the end. Let the rolls rise another 40 minutes.

Heat the oven to 250 degrees C. Brush the buns with beaten egg and top with pearl sugar. Bake for 8-10 minutes (that didn't quite work for us - we had them in there at least 15).

Try not to eat ALL of them at once.

Thursday, December 18, 2014

Thanksgiving

Oh man, am I ever behind in posting pictures and recipes of yummy things.  Since I don't know where to start, I figure Thanksgiving is probably a good place.  Possibly overwhelming; you may not get many recipes with this.  Zan and Becky came to eat and drink with us, which made for excellent company and a really fun day.  

We started with appetizers. Ed really wanted to make a vegetable terrine, so he spent a long time roasting vegetables and getting everything *just so*.  It was a very pretty terrine, unfortunately, it sort of just tasted like cold vegetables, with too much aspic on top.  I don't really know how to improve on the fact that the terrine just tasted like cold roasted vegetables. I like roasted veggies, but the other appetizers were far more interesting.  
Other appetizers included a smoked salmon plate, some chicken liver pate that Ed made that we served with shallot jam, that he also made (and this was delicious), some turkey pate that was made with some unknown parts of the bird that maybe should not have gone into the pate (this was not quite as delicious; much more gamy and not really all that delicate), and some hummus and veggies.  All my favorite things!  
We made this immediately after going for a long-ish run in the snow, so were all quite chilled by the snow and quite excited by the appetizers.  Ed managed the perfect photobomb... 


The ladies showing their excitement without the photobomb...

So, after a few more hours of eating and drinking and talking and laughing, eventually dinner was done.  Mashed potatoes, delicata squash with sage and thyme and oregano, pull-apart garlic bread, two kinds of cranberry sauce/chutney, roasted Brussels sprouts with ham and gruyere, sausage and apple stuffing and roasted turkey thighs.


No idea what's going on in this photo, but it makes me smile.


Here's a photo of my plate, which may have been overloaded. And I may have gone back for seconds, and felt quite uncomfortable after that.  But I just loooove stuffing! And you only get it once a year! It took me days to be hungry again.


No photos of dessert, but we had a slightly-more-caramelized-than-ideal tarte tatin, with vanilla ice cream, and I was so stuffed that I barely had any of it.  I should also mention that Zan arrived armed with a beer or three for each course, that we paired pretty darn successfully!

Here's the cranberry chutney recipe, at least:
2C apple cider vinegar
1 onion, diced
1/4C fresh ginger
2 tbs orange peel
1 cinnamon stick
1/2 tsp red pepper flakes
1/4 tsp ground clove
12oz cranberries
1.25C brown sugar
2 bosc pears

Cook the spices and the cider until it's reduced to ~1.5C (10min).  Add everything else, and simmer for 30 minutes, then mash coarsely.

And the stuffing, which was so delicious - I used Pioneer Woman's recipe.  Highly, HIGHLY recommend this one.  We cooked it underneath the turkey thighs, so all the drippings went right into the stuffing.  Win!

Oh, and here's the shallot jam. This one's a little estimated, since Ed made the shallot jam...

Start with several pounds of shallots. Slice thinly.
Cook on low with plenty of duck fat and salt, for 20-45min until you're starting to get some good caramelization.  Add some cider vinegar and some sugar. How much? Only Ed knows. Some. Also good are some raisins, preferably golden raisins.  Add more duck fat as needed.  Keep cooking. If things start to stick, you can add some water.  Keep cooking. Taste occasionally and keep cooking. After about an hour, it's probably ready.

This was really good with the chicken liver pate. I have no idea what the recipe for the pate was, sorry!

Thursday, June 26, 2014

Baguette rolls

We wanted to make some banh mi sandwiches the other day, but we were pretty low on any sorts of food stuffs.  Luckily, we're masters of cleaning-out-the-fridge sorts of meals, and ended up with a damn tasty sandwich.  I believe we had oyster mushrooms, cilantro, yellow pepper and some sort of spicy mayo on the sandwiches, and we made the bread relatively quickly. Total success. But, the bigger success was that I figured out a method (finally!) to get my bread to crust up like a proper baguette.  

I've noticed that the NYT no-knead bread has pretty much the awesomest crust ever, as well as the proper amount of holes on the inside.  I knew that given the short rise time and lazy knead time meant no big holes, but if we could just get a good crust... that might make it worthwhile.  The advantage of that NYT bread is that it's cooked in a dutch oven, so the steam from the dough itself makes a little steam bath for the bread inside of the dutch oven. So, I figured I'd try making my whole oven into a steam bath.  I started things at 500F, and then dropped the heat to 350, to properly cook the insides once the crust had done it's thing, and boy was this ever a success.  Try it for yourself - totally worth it!


Baguette Rolls
Start by making your bread dough. About 2C of warm water, a spoonful of sugar, a spoonful of yeast. Add flour until it's paste-like, then add a spoonful of salt.  Maybe a splash of olive oil.  Add more flour until the dough is at a knead-able consistency. Knead for 5 minutes or so.

Go for a run.  (I believe in this case the rise time was ~1:15).

Come back, wash your hands (yes, you, you know you've been snot rocketing while running), and divide the dough into whatever size rolls you want. Put them into whatever shape you feel like. Preheat the oven to 500F, and put a pan full of water on the bottom shelf. Let that preheat and steam for 20min or so.  Then cut some gashes (crosses, slices, whatever, score the top) into each roll, put them on a pan (maybe grease the pan first, or put down cornmeal or something), and stick the rolls into the oven.

Cook at 500 for 10min or so, then without opening the oven, drop the heat to 350ish, and cook another 20-30min.  They're done when the bottom makes a hollow noise when you knock on it. They may look done sooner, since the tops will be golden brown and delicious thanks to the steam earlier than the insides are cooked, but go with the knocking test.  

Enjoy!


Wednesday, November 27, 2013

Kale rolls

So, back over the summer Ed and I were browsing around the farmer's market in Londonderry, trying not to spend all our money on a single bunch of kale (these veggies can be expensive at the farmers markets...), and totally got suckered into buying a deliciously tasty bread-stuff-with-kale-inside-it thing. I don't remember if it was loaf-shaped or what, but I do remember a deliciously crusty outer bit and lemon-y garlic-y kale mixture on the inside.  Too overpriced to buy more than one of these kale loaves, I set out to make one, but didn't quite get around to that until months after the initial experience.

These kale rolls are awesome.  They're basically a cinnamon bun, only instead of a flaky soft dough, they have the texture of a focaccia, crusty on the outside and moist on the inside.  I highly recommend making some of these.  They can be a hearty dinner roll, or just most of your lunch.  The garlic is a bit much for breakfast, I have to admit...


You need one recipe of normal bread.  I recommend ~2C warm water, ~1tsp yeast, ~1tsp sugar, and as much flour as that takes to get it to a kneadable state.  Knead, then let it rise an hour or two.

For the filling, dice some garlic (ok, lots of garlic, like 3-4 cloves), and toast that in a little olive oil.  Chop a big ol' bunch of kale into small pieces, and add to the garlic, adding more oil as needed and the juice from a lemon.  Cook until the kale leaves are at a texture you like them at - I like them with a little bite to them still, but I know some people like to overcook their greens till they're good and dead. Don't forget some salt and pepper.  The filling should taste pretty good on its own, once you're done with it.

Now roll out your dough to ~1/4-1/2" thickness.  It doesn't really matter; the thinner your dough, the more rolls of kale you get, the thicker your dough, the more bready it'll taste.  This is sort of like a pizza dough - one size does NOT fit all.  

Spread the kale filling across the entire rectangle of rolled-out dough.  You don't want the filling to be too thick, but you also don't want it too thin.  Not the most helpful of statements, sorry.  Roll the dough, starting with the long end, until you have a single snake.  Then cut into ~3-4" slices.  Flip them onto the cut side on a greased pan, with a bit of space between the rolls.  Let that rise another 30 minutes or so, then stick them in a 400F oven for 20-30 minutes; until they're done, really.  One option is to brush melted butter or olive oil on top of the rolls just before baking, and that'll help them turn golden brown on top.

Enjoy!

If these directions are too vague... well, the good news is that even if you don't quite get it perfect, this is a tasty enough bread recipe that it's worth making a couple times to perfect it!

Sunday, June 23, 2013

Olive bread

This is a good bread.  Definitely got a high Ed-rating, and most recently a high real-person rating, too, when I brought it to dinner the other day.  Use good kalamata olives - canned olives will just taste like canned olives, which can be tasty if there's nothing else to eat in your house, but the kalamata olives taste way better.  This bread used a starter, which is how you'd do sourdough if you're into that, but I'm not, because there's no way I'd keep a sourdough starter alive; I can't even keep plants alive.  Anyway, I find the bread is easier to knead when you've used a starter, and then it rises wonderfully once you knead in all the extra stuff.  But I haven't figured out how to get those big holes, which to me is the mark of tasty bread.  Ed likes that this stuff is a pretty uniform texture.  I want big holes, like in the no-knead bread that I sometimes make.  I probably just have to let it rise longer after I shape it.  

This is probably ~1C olives.  Looks like a lot, but it's just right.

Kalamata Olive Bread
Makes one loaf

Starter:
2-2.5C flour
1/4tsp yeast
1.75C warm water

Mix together all the start ingredients.  It was really humid today, so I used 2.5C flour instead of the usual 2.  Then let that sit for 2 hours.  At the end, it should look all loose and bubbly, like the photo above.

Dough:
2-3C flour
~1C olives
~1tbs salt
a glug or two of olive oil

Add two cups of flour and the salt and olive oil to the start, and mix that with a spoon until it comes together enough to knead.  Knead for a while, until it makes a nice little doughball.  Add the olives, and knead/fold until the olives are all combined.  You'll probably need to add another cup of flour to keep things workable during this process.  


Looks like too many olives...

But it's not too many - just right!

Let the kneaded dough sit in a greased bowl for another 2 hours.  At the end, it should be soft and pillowy, and about twice as large.  Transfer that to a baking sheet, that's either been greased or has coarse cornmeal on it.  

Preheat the oven to 450.  Once that's pre-heated, in goes the dough, and turn the oven down to 350.  Bake for 20-40min, checking every 10min or so; remove the bread once it's toasty golden brown on top, and has a hollow sound when you knock on the bottom.  This one took 40min for me.

Try to let it cool at least 5-10min before cutting into it.

Enjoy!

Friday, February 22, 2013

Beer bread

Beer bread is one of those amazing foods that doesn't take long to make, but tastes delicious. These photos are from January, I think, when Ross and Sam appeared in our kitchen and we ate food and laughed together. Ed had made some sort of delicious beef stew, which was good, but we needed something for mopping up the juices, and had no bread, so Sam and I threw together some beer bread while waiting for Ross to show up from the track workout. Because we wanted the bread to cook quickly, we put it into two 9" diameter cake pans, rather than your typical loaf pan, and holy cow, that is an improvement! Because the best part about beer bread is the crunchy crusty butter-soaked topping, and with two flatter loaves, you get even more crust! So delicious. Next time you make beer bread, definitely put it into two flatter pans, or even one wide flat pan (and don't forget the butter on top!). I've put a basic recipe for beer bread, below.


Beer Bread
3C flour
1tbs baking powder
1/4C sugar
1 tsp salt
12oz beer (I think we used a fairly basic brown beer)
1/2 stick butter, melted, for topping.

Mix everything except the butter in a big bowl. Grease two 9" round cake pans. Pour the batter evenly into the pans, maybe shake it around to spread it out. Pour the melted butter on top, maybe sprinkle with some kosher salt if you really want. Bake at 350 until done. (start with 15min and keep checking every 5-10 min). Cool ever so briefly, slice it up, and enjoy!

Saturday, February 9, 2013

Snowpocalypse sticky buns

Winter storm Nemo hit Boston Friday night, and is still going strong into Saturday morning, so I figured what better time to bake something delicious? Thankfully we haven't lost power, despite three transformers going out (flash! bang!) in the thirty minutes we were out for a walk last night. These buns have an overnight rise, so you have to continue to trust that the power won't go out in the morning, when you want to bake them, but luckily we're all set now!

I couldn't find a recipe I really liked online, so I sort of made up my own. You want a rich, dense, dough, and I was going to make these ones from Bonappetit.com, because they look delicious, but I read through the recipe, and I got to the bottom where they list the nutrition information, and it's 830 calories *for one bun*. I may eat 3000 calories a day, but I think I can probably find a recipe without three sticks of butter in it. I want breakfast, not dessert...

Anyway, here's my recipe. It was delicious. Ed-rating was also delicious, but he would prefer a lighter, more pastry-like dough, and more gooey filling on the inside. Ok, so that three-stick-of-butter recipe... The only trouble is that I ended up with 14 sticky buns, so maybe I should have cut them smaller, to fill two pans. Instead, I crammed 11 of them into one pan, and the others didn't get a topping (they were still delicious - think cinnamon roll).

Sticky buns


Dough
1C milk, warmed up in microwave to lukewarm
2 tbs melted butter
1/4C sugar
1 tsp yeast
1 tsp kosher salt
1 egg
3.5-4C flour

Mix together the milk, butter, sugar, and egg. Beat well, to froth the egg. Dump in the yeast, and let that stand ~5min until it's a bit bubbly. Dump 2C flour and the salt on top, mix up the salt and flour before mixing the dry stuff down into the wet. Add another cup of flour, mix that in - at this point, it'll be rough and shaggy, you want to get it to a smooth and silky texture. Use the fourth cup of flour to knead the dough until it's smooth and silky, adding flour as necessary. Grease a bowl, and put the dough in the bowl for 1-2hrs, until it's about doubled in bulk.

Topping
This made twice as much as I needed - halve
4tbs butter
3/4C brown sugar, packed
1/2tbs corn syrup
1tbs cream

Put all the ingredients into a non-stick pan on the stovetop. Cook over medium, until you get some bubbles: Once you have bubbles, simmer, stirring the bubbles occasionally, for 3-4 minutes. Remove from heat, and pour the topping into two very well-greased 8" diameter pan (one pan if you make half the amount of filling. Duh). Meanwhile, toast the pecans in the oven, for ~10min (don't burn them!). Sprinkle the pecans onto the topping that's cooling in the pan. Filling
3 tbs butter, melted
~2-4tbs brown sugar
~2-4 tsp cinnamon

Once the dough has risen, roll the dough into a long rectangle on a lightly floured surface. Supposedly, 12x16" and 1/4" thick. I just sort of rolled it out until it looked big enough. Because it's so dense and rich and has already risen, the dough won't scootch back the way pizza dough sometimes does. It'll stay right where you roll it. Melt the butter in the microwave, and pour on top of your dough log. Use your fingers to spread out the butter evenly, across the whole surface. Then take the brown sugar, and sprinkle on top of the butter. Use your fingers again to spread it around and get even coverage, but leave a ~1" strip along the top (away from you) with no sugar. Liberally sprinkle cinnamon on top of the sugar. Now roll your dough log tightly, starting with the end that's towards you, and place it seam-side down. Cut in half with a sharp knife, then put the two halves next to each other and cut into ~1" rolls (I cut mine too high, hence only ending up with 14 rolls instead of 16). Place the rolls cut-side down into the prepared pan of toping. Don't let them touch each other - they'll rise overnight and in the oven. Let the rolls rise overnight in the fridge (cover with plastic wrap or a towel or tinfoil or whatever), and in the morning, take them out. They need to heat back up to room temperature, I put mine next to the radiator in the kitchen to speed the process. Once they're at room temperature, preheat your oven to 400F. Cover the rolls with tinfoil loosely, to prevent the tops from browning too much, stick them in the hot oven, and immediately reduce the heat to 350. Cook for 20min with the tin foil on, then remove the tin foil and cook another 15min. Once they're done, golden brown and delicious, immediately invert the pan onto a plate. Scrape any extra gooey bits onto the buns =). Let them cool just enough that you don't burn your fingers, and enjoy! Before inverting.